SMART on FHIR EHR Launch: How to Build the Sequence

Getting a smart on fhir ehr launch working right is one of the trickiest parts of building anything that lives inside EPIC. You launch from within a patient chart, EPIC redirects your app through an OAuth2 dance, and if any step is off, you get a blank iframe or a silent auth failure with no useful error message. Most teams burn weeks debugging launch tokens before they even get to the actual clinical workflow.
This guide walks through the full smart on fhir launch sequence step by step: the EHR launch request, the authorization redirect, token exchange, and how to correctly render your app inside the smart on fhir iframe EPIC provides. You'll see exactly what parameters EPIC sends, what your smart on fhir app launcher needs to handle, and where teams typically get the handshake wrong.
We wrote this because we watch vendors try to build a smart on fhir app from scratch and hit the same launch bugs every time, the ones that eat months of engineering time before EPIC Showroom submission is even possible. If you'd rather skip that build entirely, VectorCare handles the launch sequence, compliance, and Showroom listing for you. But if you're implementing it yourself, here's exactly how the sequence works.
What is the SMART on FHIR EHR launch sequence?
The SMART on FHIR EHR launch sequence is the specific chain of redirects and token exchanges that lets your app open inside a patient's chart, prove who it is, and pull FHIR data without EPIC ever handing over a raw password or session cookie, and it helps to know how SMART on FHIR builds on top of FHIR before you start. It's built on OAuth2 with an extra registration layer that EPIC controls tightly, exposed through Epic Interconnect, the middleware serving those FHIR and OAuth endpoints. Unlike a typical third-party OAuth integration where you send users to a login screen you control, EPIC initiates the launch itself. The clinician clicks your app's icon inside the chart, and EPIC starts the handshake by sending your app two pieces of context it needs before anything else can happen.
Context matters here because EPIC supports two distinct launch types, and confusing them is one of the most common reasons a smart on fhir app launch fails during testing. An EHR launch happens from inside EPIC, triggered by a user action in the chart, and EPIC sends a launch parameter along with the iss (issuer) URL identifying which FHIR server to talk to. A standalone launch happens when your app opens outside EPIC first, maybe from a link in an email or a separate portal, and your app has to discover the FHIR server on its own before starting the OAuth flow. Health system vendors overwhelmingly need the EHR launch flow, since that's what lets your app show up as a button inside a chart, order screen, or flowsheet.
| Launch type | Triggered from | Parameters received | Typical use case |
|---|---|---|---|
| EHR launch | Inside EPIC (chart, orders, flowsheet) | iss, launch |
In-workflow apps, chart-embedded tools |
| Standalone launch | Outside EPIC (external link, portal) | None initially, app discovers iss itself |
Patient-facing apps, mobile apps opened independently |
Why the sequence exists
Sequence design isn't arbitrary. EPIC needs to confirm three things before it lets your app touch patient data: that your app is registered and approved, that the specific launch request came from a real EPIC session, and that the resulting access token is scoped only to what your app was approved for. That's why the flow always moves through registration, launch context, discovery, authorization, and token exchange in that order, and skipping or reordering any of those steps breaks the handshake.
The launch sequence exists to prove three things at once: your app is registered, the request is real, and the token it gets back is scoped tightly.
The full sequence at a glance
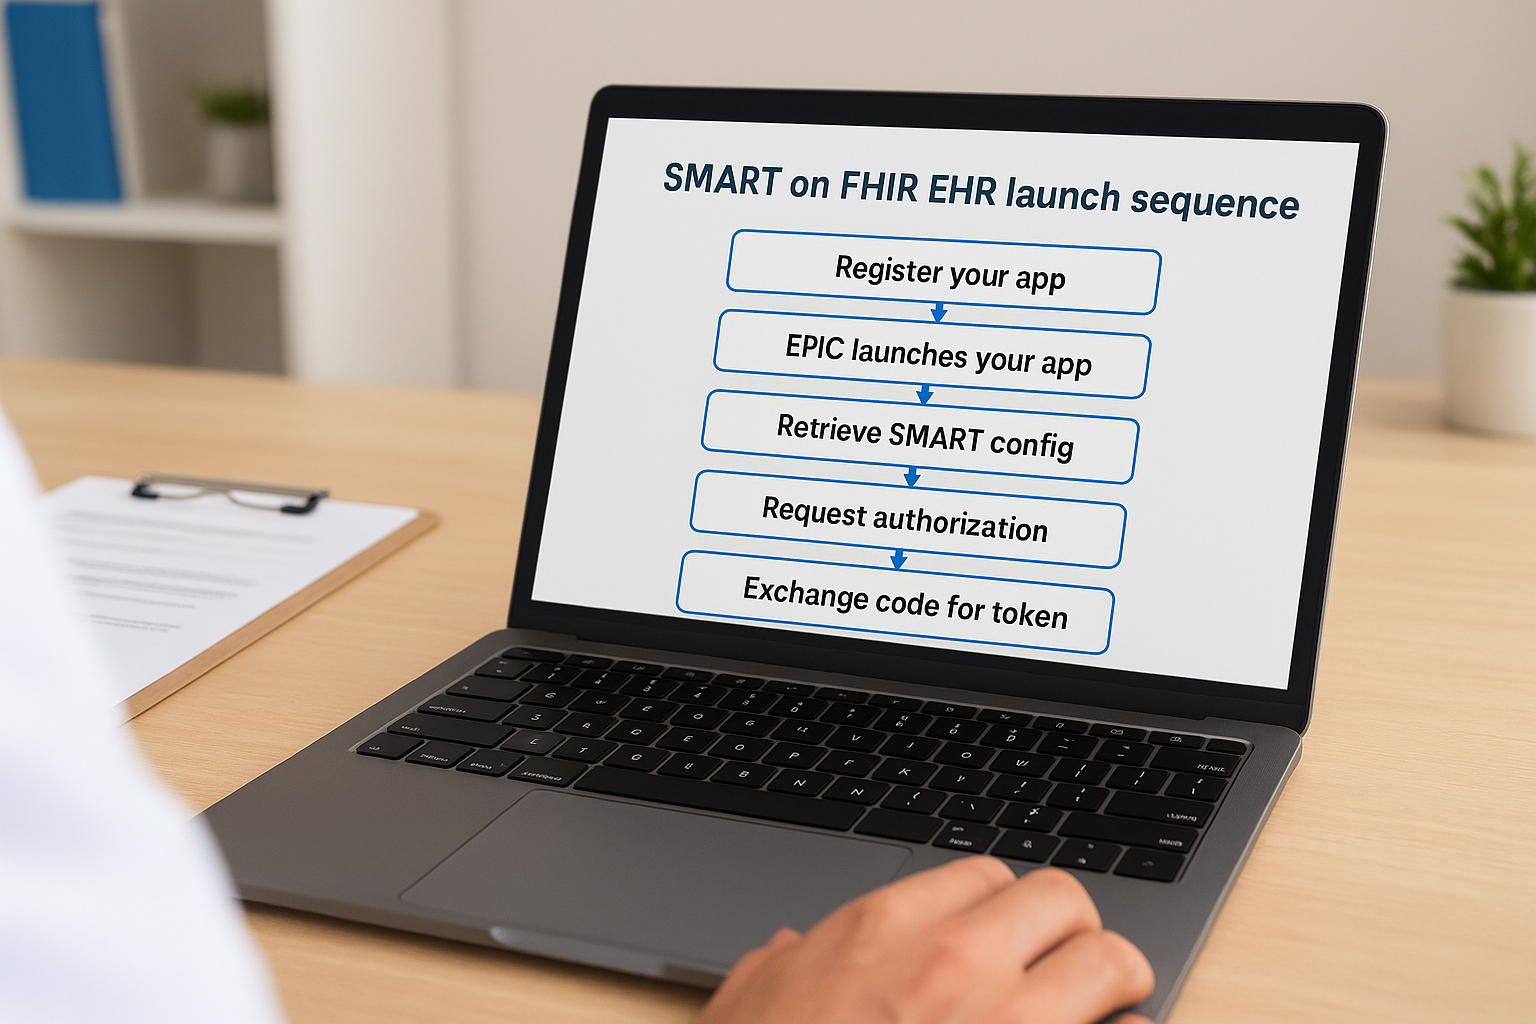
Before diving into implementation, it helps to see the whole smart on fhir launch sequence laid out as a checklist. Each of the following steps maps to a section later in this guide:
- Register your app with EPIC and receive a client ID.
- EPIC launches your app via iframe (EHR launch) or you open it standalone.
- Your app retrieves the SMART configuration from EPIC's FHIR server.
- Your app requests an authorization code from EPIC's auth endpoint.
- Your app exchanges that code for an access token.
- Your app calls the FHIR API using the access token.
- Your app refreshes the token before it expires, without interrupting the clinician's session.
Most of the debugging pain vendors run into shows up in steps three through five, where a mismatched redirect URI, an incorrect scope string, or a stale client ID produces a failure with almost no diagnostic detail. Knowing the full shape of the sequence before you start coding saves you from chasing symptoms in the wrong step. The rest of this guide walks through each one with the exact parameters, endpoints, and request shapes EPIC expects.
Step 1. Register your app with the EHR
Before any launch parameter ever reaches your app, you need to register your app with EPIC through the App Orchard developer portal (now called EPIC Showroom for the marketplace-facing side). This registration is what generates the client ID your app presents at every later step, and it's also where you declare your redirect URIs, the FHIR resources you need access to, and whether your app supports EHR launch, standalone launch, or both. Skip or misconfigure this step and every later redirect fails silently, because EPIC won't trust a launch request from a client ID it doesn't recognize.
Getting the registration details right matters more than most teams expect. EPIC validates your redirect URI against the exact string you registered, so a trailing slash mismatch or an http versus https difference will block the whole handshake with no useful error message. You also choose your app's launch context here (patient, encounter, or both), which determines what data EPIC hands your app during launch.
A single mismatched redirect URI in your EPIC registration will silently break every step that follows it.
What to configure during registration
When you set up your app in the developer portal, you'll need to provide the following:
- App name and description as they'll appear to health systems browsing the Showroom
- Redirect URI(s) exactly matching what your app will send during the auth request
- Launch type(s) supported: EHR launch, standalone launch, or both
- Requested FHIR scopes, scoped as narrowly as your app actually needs (
patient/Observation.read, not a blanket read on everything) - Non-production and production client IDs, since EPIC issues separate credentials for its sandbox and live environments
Client ID (non-prod): a1b2c3d4-sandbox
Redirect URI: https://yourapp.com/launch/callback
Launch type: EHR launch (backend-confidential or public client)
Scopes: launch patient/Patient.read patient/Observation.read offline_access
Notice the offline_access scope in that example. If your app needs to refresh tokens later without forcing the clinician to relaunch, you have to request that scope now, at registration time, not bolt it on after testing starts.
Registration is also where the compliance clock starts, and it's the first real milestone in getting your app into Epic. EPIC expects your BAA and security documentation to be in order before it approves production access, which is a separate track from the technical Epic integration setup but runs in parallel. This is the part of the process VectorCare's no-code workflow builder handles automatically, generating the correct client configuration and managing the compliance paperwork so you're not reconciling registration settings against your code weeks later.
Step 2. Launch the app via iframe or standalone entry
Once EPIC recognizes your client ID, it needs a way to actually hand control to your app, and this is where the iframe launch becomes the defining trait of an EHR launch. When a clinician clicks your app inside the chart, EPIC opens your registered redirect URI inside an iframe and appends two query parameters: launch, an opaque string EPIC generates for that specific session, and iss, the base URL of the FHIR server your app must talk to. Your smart on fhir app launcher needs to grab both values immediately, because you'll need them again in the very next step to fetch the SMART configuration.
What the iframe request actually looks like
Grabbing the right parameters at launch time is non-negotiable, since losing the launch value means you can't complete authorization at all.
GET https://yourapp.com/launch/callback?iss=https://fhir.epic.com/interconnect-fhir-oauth/api/FHIR/R4&launch=eyJrIjoiMTIz...
Lose the launch parameter on the first request, and there's no way to recover the session, you have to wait for EPIC to relaunch you.
Handling that request correctly means your backend does three things right away:
- Stores the
launchvalue in server-side session state, not a cookie the iframe might block - Stores the
issvalue to know which FHIR base URL to query - Immediately kicks off the SMART configuration discovery covered in the next step, rather than rendering any UI first
Handling a standalone launch instead
Standalone entry works differently because there's no chart context handing you an iss value up front. Your app opens on its own, maybe from a link a patient clicks or a portal a case manager uses outside EPIC, and it has to figure out which FHIR server to talk to before anything else happens. Typically that means either hardcoding the known iss for a given health system's production environment or presenting a picker where the user selects their organization, which then maps to a stored iss value in your app's configuration.
Users launching standalone also won't have a launch parameter at all, since there's no active chart session generating one. Your app skips straight to discovery and authorization without that context token, which changes the scope you can realistically request. Most vendors building for health system contracts rely almost entirely on the EHR launch path, since standalone entry rarely fits a clinical workflow, but it's worth building the fallback if your app also serves patients directly.
Step 3. Retrieve the SMART configuration
With the iss value in hand from the launch request, your app needs to discover where EPIC's authorization and token endpoints actually live before it can request anything. SMART configuration discovery is the mechanism that makes this possible, working much like an OpenID Connect discovery endpoint: every FHIR server that supports SMART on FHIR publishes a well-known JSON document describing its OAuth2 endpoints, supported scopes, and capabilities. Fetching this document is a plain unauthenticated GET request, no token required, because you need it before you have a token at all.
Skip discovery and hardcode endpoints, and the first EPIC upgrade that changes a URL breaks your app with no warning.
Where to find the configuration
Append /.well-known/smart-configuration to the iss base URL you captured during launch, then parse the JSON response:
GET https://fhir.epic.com/interconnect-fhir-oauth/api/FHIR/R4/.well-known/smart-configuration

Response (abbreviated):
{
 "authorization_endpoint": "https://fhir.epic.com/interconnect-fhir-oauth/oauth2/authorize",
 "token_endpoint": "https://fhir.epic.com/interconnect-fhir-oauth/oauth2/token",
 "capabilities": ["launch-ehr", "client-public", "context-ehr-patient"],
 "scopes_supported": ["launch", "patient/Patient.read", "offline_access"]
}
Every health system running EPIC hosts its own FHIR server instance, so this document will resolve to different URLs depending on which organization launched your app. Never assume the endpoints from your sandbox testing will match production for a given customer, always fetch fresh from that customer's iss.
What you need from the response
Once you have the parsed JSON, pull out the values your smart on fhir app launcher needs for the next two steps:
authorization_endpoint, where you'll send the user to request an authorization codetoken_endpoint, where you'll later exchange that code for an access tokencapabilities, confirming the server actually supports the launch context and client type you registered forscopes_supported, useful for catching a scope mismatch before you waste a round trip on a request EPIC will reject
This discovery step also doubles as a sanity check on your registration. If capabilities doesn't list launch-ehr or the client type you expected, something in your App Orchard setup needs fixing before you touch the authorization request at all. Teams that skip this check often trace an authorization failure back to a registration mismatch that discovery would have surfaced immediately.
Step 4. Request an authorization code
With the authorization_endpoint pulled from the SMART configuration, your app builds a redirect URL that sends the clinician's browser to EPIC's authorization server. This is where the smart on fhir launch sequence shifts from passive context-gathering to actively asking EPIC for permission, the authorization code flow in plain English. Your app never sees a username or password here. Instead, EPIC handles authentication on its own domain and, once satisfied, redirects the browser back to your registered redirect URI carrying a short-lived authorization code.
Building the authorization request
Assembling this request correctly means including every required parameter EPIC expects, since a missing or malformed one produces a redirect back to your app with an error code instead of the authorization code you need. The request is a GET to the authorization endpoint with these query parameters:
GET https://fhir.epic.com/interconnect-fhir-oauth/oauth2/authorize?
 response_type=code
 &client_id=a1b2c3d4-sandbox
 &redirect_uri=https://yourapp.com/launch/callback
 &launch=eyJrIjoiMTIz...
 &scope=launch patient/Patient.read patient/Observation.read offline_access
 &state=8f14e45fceea167a5a36dedd4bea2543
 &aud=https://fhir.epic.com/interconnect-fhir-oauth/api/FHIR/R4
Each parameter carries specific weight in the exchange:
| Parameter | Purpose |
|---|---|
response_type |
Always code for this flow |
client_id |
The ID you received during registration |
redirect_uri |
Must exactly match what you registered, no exceptions |
launch |
The value captured from the original EHR launch request |
scope |
Must be a subset of what you registered and what scopes_supported allows |
state |
A random value your app generates to prevent CSRF |
aud |
The FHIR server audience, matching your iss |
A
redirect_urithat's off by even one character sends EPIC's error back to a URL your app never sees.
Validating the response before moving on
Once EPIC redirects back to your callback with ?code=...&state=..., your app's first job is confirming the state value matches exactly what it generated before the redirect. Skipping this check leaves your app open to CSRF attacks where a malicious party injects their own authorization code into a victim's session. Only after that check passes should your app treat the code as valid and move to token exchange.
Failures at this step usually surface as an error and error_description parameter appended to the redirect instead of a code, and reading that description carefully almost always points straight at a scope mismatch or a registration problem from Step 1.
Step 5. Exchange the code for an access token
Once your app has a validated authorization code, it's time to trade that code for something actually useful: an access token that lets you call the FHIR API. This token exchange happens server-side, never in the browser, because it requires your client secret (for confidential clients) and you don't want that exposed to anything running in the iframe. Your app sends a POST request to the token_endpoint you pulled from the SMART configuration back in Step 3, and EPIC responds with the credentials your app needs to actually pull patient data.
The token exchange is the one request in the whole sequence that must never touch the browser, since it's the only step carrying a secret worth stealing.
Building the token request
Sending the wrong content type or missing a single required field here is one of the most common places vendors trying to build a smart on fhir app get stuck, since EPIC's error responses at this endpoint are often terse. The request must be form-encoded, not JSON, and needs these parameters:
POST https://fhir.epic.com/interconnect-fhir-oauth/oauth2/token
Content-Type: application/x-www-form-urlencoded

grant_type=authorization_code
&code=SplxlOBeZQQYbYS6WxSbIA
&redirect_uri=https://yourapp.com/launch/callback
&client_id=a1b2c3d4-sandbox
&client_secret=your-client-secret (confidential clients only)
For public clients, which is common for apps rendered purely client-side inside the iframe, you'll use PKCE instead of a client secret, one of several OAuth 2 grant types, meaning you generated a code verifier before the authorization request and now include it here so EPIC can confirm it matches the code challenge you sent earlier.
What comes back in the response
A successful response gives you everything the rest of the sequence depends on:
access_token, the bearer token you'll attach to every FHIR API callexpires_in, typically 3600 seconds, telling you exactly when you need to refreshrefresh_token, present only if you requested theoffline_accessscope back at registrationpatient, the FHIR patient ID for the chart the clinician was viewing at launchscope, the actual granted scopes, which may be narrower than what you requested
Store all five values in server-side session state tied to the clinician's session, not client-side storage, since the access token alone is enough to pull patient records if it leaks, which is why disciplined token management matters here. Check the granted scope against what your app actually needs before moving forward. A silently truncated scope list here is a common reason a later API call returns a 403 instead of the data you expected.
Step 6. Call the FHIR API with your token
With an access token sitting in server-side session state, your app can finally do the thing it was built for: pull real patient data out of EPIC. Every FHIR API call attaches that token as a bearer credential in the Authorization header, and EPIC checks it against the scopes granted back in Step 5 before returning anything. This is the payoff step in the smart on fhir launch sequence, but it's also where a lot of vendors discover their scope request was too narrow, too broad, or just slightly mismatched from what the endpoint expects.
Building the API request
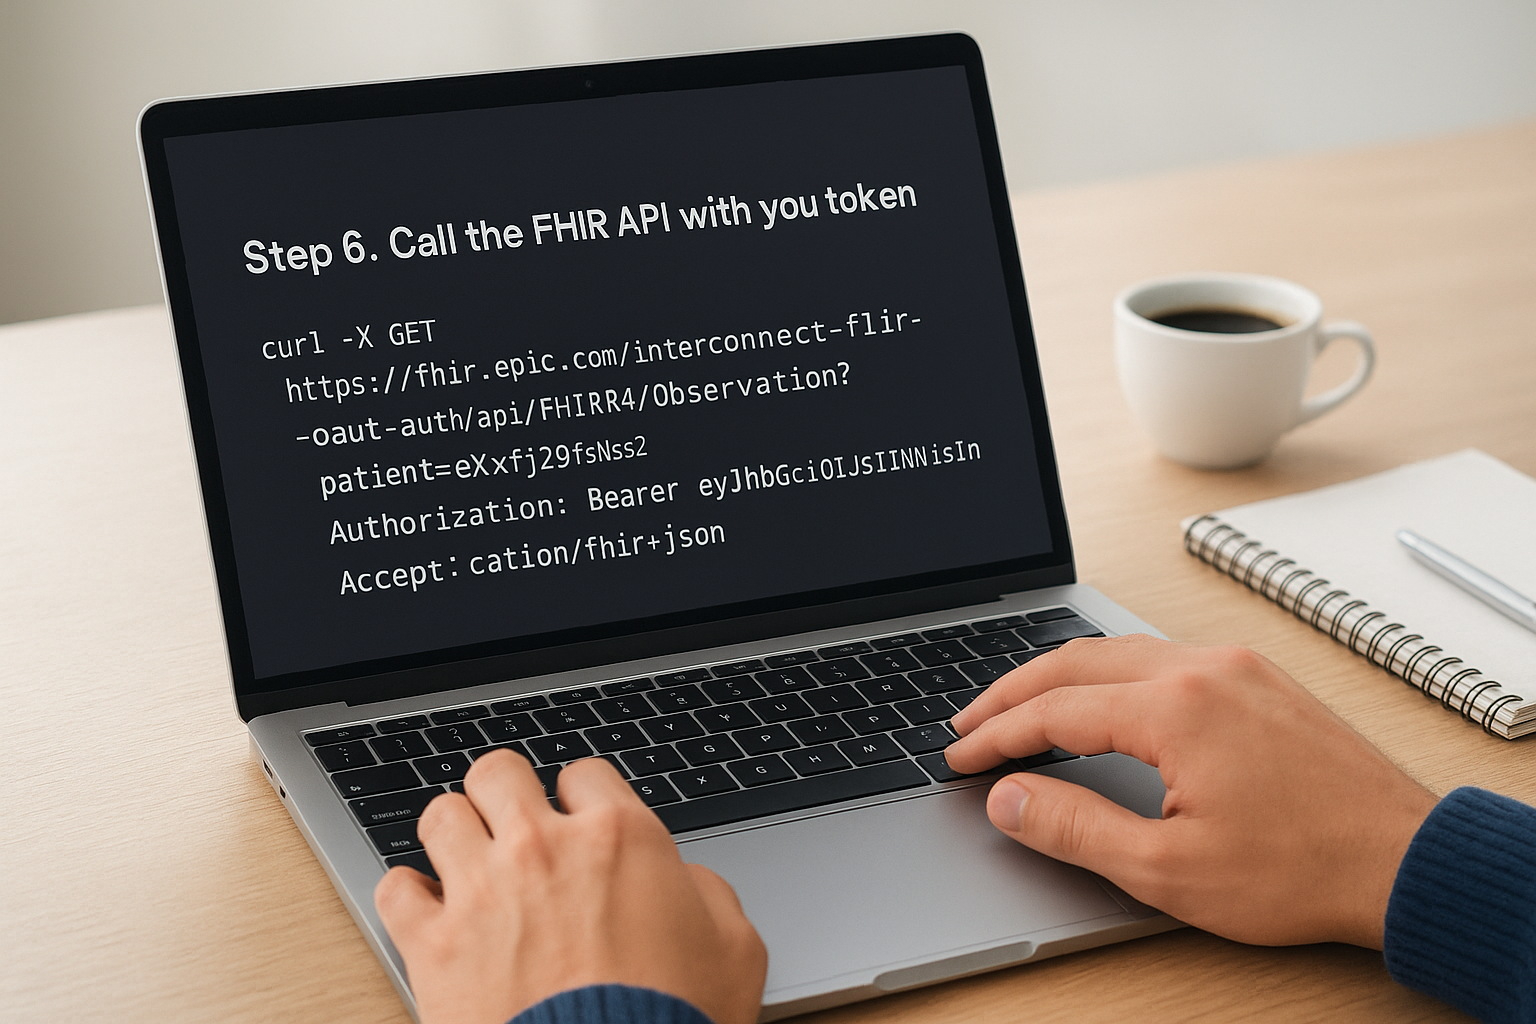
Requesting a resource means combining the FHIR base URL from your iss value with the resource path and the patient ID EPIC handed back in the token response, the same pattern covered in our step-by-step guide to using Epic's FHIR API. A typical call to pull observations for the patient in view looks like this:
GET https://fhir.epic.com/interconnect-fhir-oauth/api/FHIR/R4/Observation?patient=eXsxfj29fSNSs2
Authorization: Bearer eyJhbGciOiJSUzI1NiIsInR5cCI6...
Accept: application/fhir+json
Notice the Accept header. EPIC's FHIR servers expect application/fhir+json specifically, not a generic application/json, and some endpoints will reject the request outright if that header is missing or wrong, a detail worth confirming in Epic's own FHIR API documentation.
Handling the response and common errors
Successful responses come back as a FHIR Bundle, a wrapper object containing an array of matching FHIR resource types under an entry field, each with its own resource type and ID. Parsing that bundle correctly matters more than it sounds like it should, since a lot of teams write parsing logic that assumes a single resource and breaks the first time EPIC returns zero or several.
Errors at this stage usually fall into a short list, and recognizing which one you're looking at saves real debugging time:
| Status code | Likely cause |
|---|---|
| 401 | Token expired or malformed, check Step 7 |
| 403 | Scope granted doesn't cover the resource requested |
| 404 | Resource ID or patient ID doesn't exist on this FHIR server |
| 429 | Rate limit hit, back off and retry with delay |
A 403 almost always traces back to a scope you forgot to request at registration, not a bug in your API call.
Rate limits deserve extra attention if your smart on fhir app launcher fires off several resource calls at once during launch, since EPIC throttles aggressively per client ID. Building in a short retry-with-backoff pattern from day one avoids a launch that works fine in testing but falls over under real clinical load.
Step 7. Refresh the access token before it expires
An access token from Step 5 typically expires in an hour, and nothing about the smart on fhir ehr launch sequence pauses the clinician's workflow while you go fetch a new one. Your app needs to refresh the access token silently in the background, using the refresh_token you stored earlier, so the clinician never sees a login prompt or a broken screen mid-chart, which is where the difference between an access token and a refresh token becomes practical. This only works if you requested the offline_access scope back at registration in Step 1, since EPIC won't issue a refresh token otherwise.
If you skipped requesting
offline_accessat registration, there's no refresh path, you have to force a full relaunch every hour.
Building the refresh request
Sending the refresh request looks almost identical to the original token exchange from Step 5, just with a different grant_type and no authorization code involved:
POST https://fhir.epic.com/interconnect-fhir-oauth/oauth2/token
Content-Type: application/x-www-form-urlencoded

grant_type=refresh_token
&refresh_token=8xLOxBtZp8
&client_id=a1b2c3d4-sandbox
&client_secret=your-client-secret (confidential clients only)
EPIC responds with a fresh access_token, a new expires_in window, and often a rotated refresh_token that replaces the one you just used. Overwrite the stored value immediately, since the old refresh token may be invalidated the moment the new one is issued.
Timing the refresh correctly
Waiting until a token actually expires before refreshing it guarantees at least one failed API call, so build the refresh trigger around a buffer instead. A background job that checks expires_in and refreshes a few minutes early keeps every API call in Step 6 working without interruption:
- Trigger a refresh once roughly 80% of the token's lifetime has passed, not at the moment it expires
- Retry a failed refresh once before falling back to a full relaunch prompt
- Log every refresh failure with the client ID and timestamp, since EPIC occasionally revokes refresh tokens after extended inactivity
- Never let a refresh failure surface as a raw 401 to the clinician, catch it and prompt a clean relaunch instead
Refresh tokens don't last forever either. EPIC typically expires them after a set inactivity window measured in days, so an app a case manager only opens once a week may find itself needing a full relaunch anyway. Building a graceful relaunch path, rather than assuming refresh will always work, saves you from a support ticket the first time a token quietly dies overnight.
Putting the launch sequence into practice
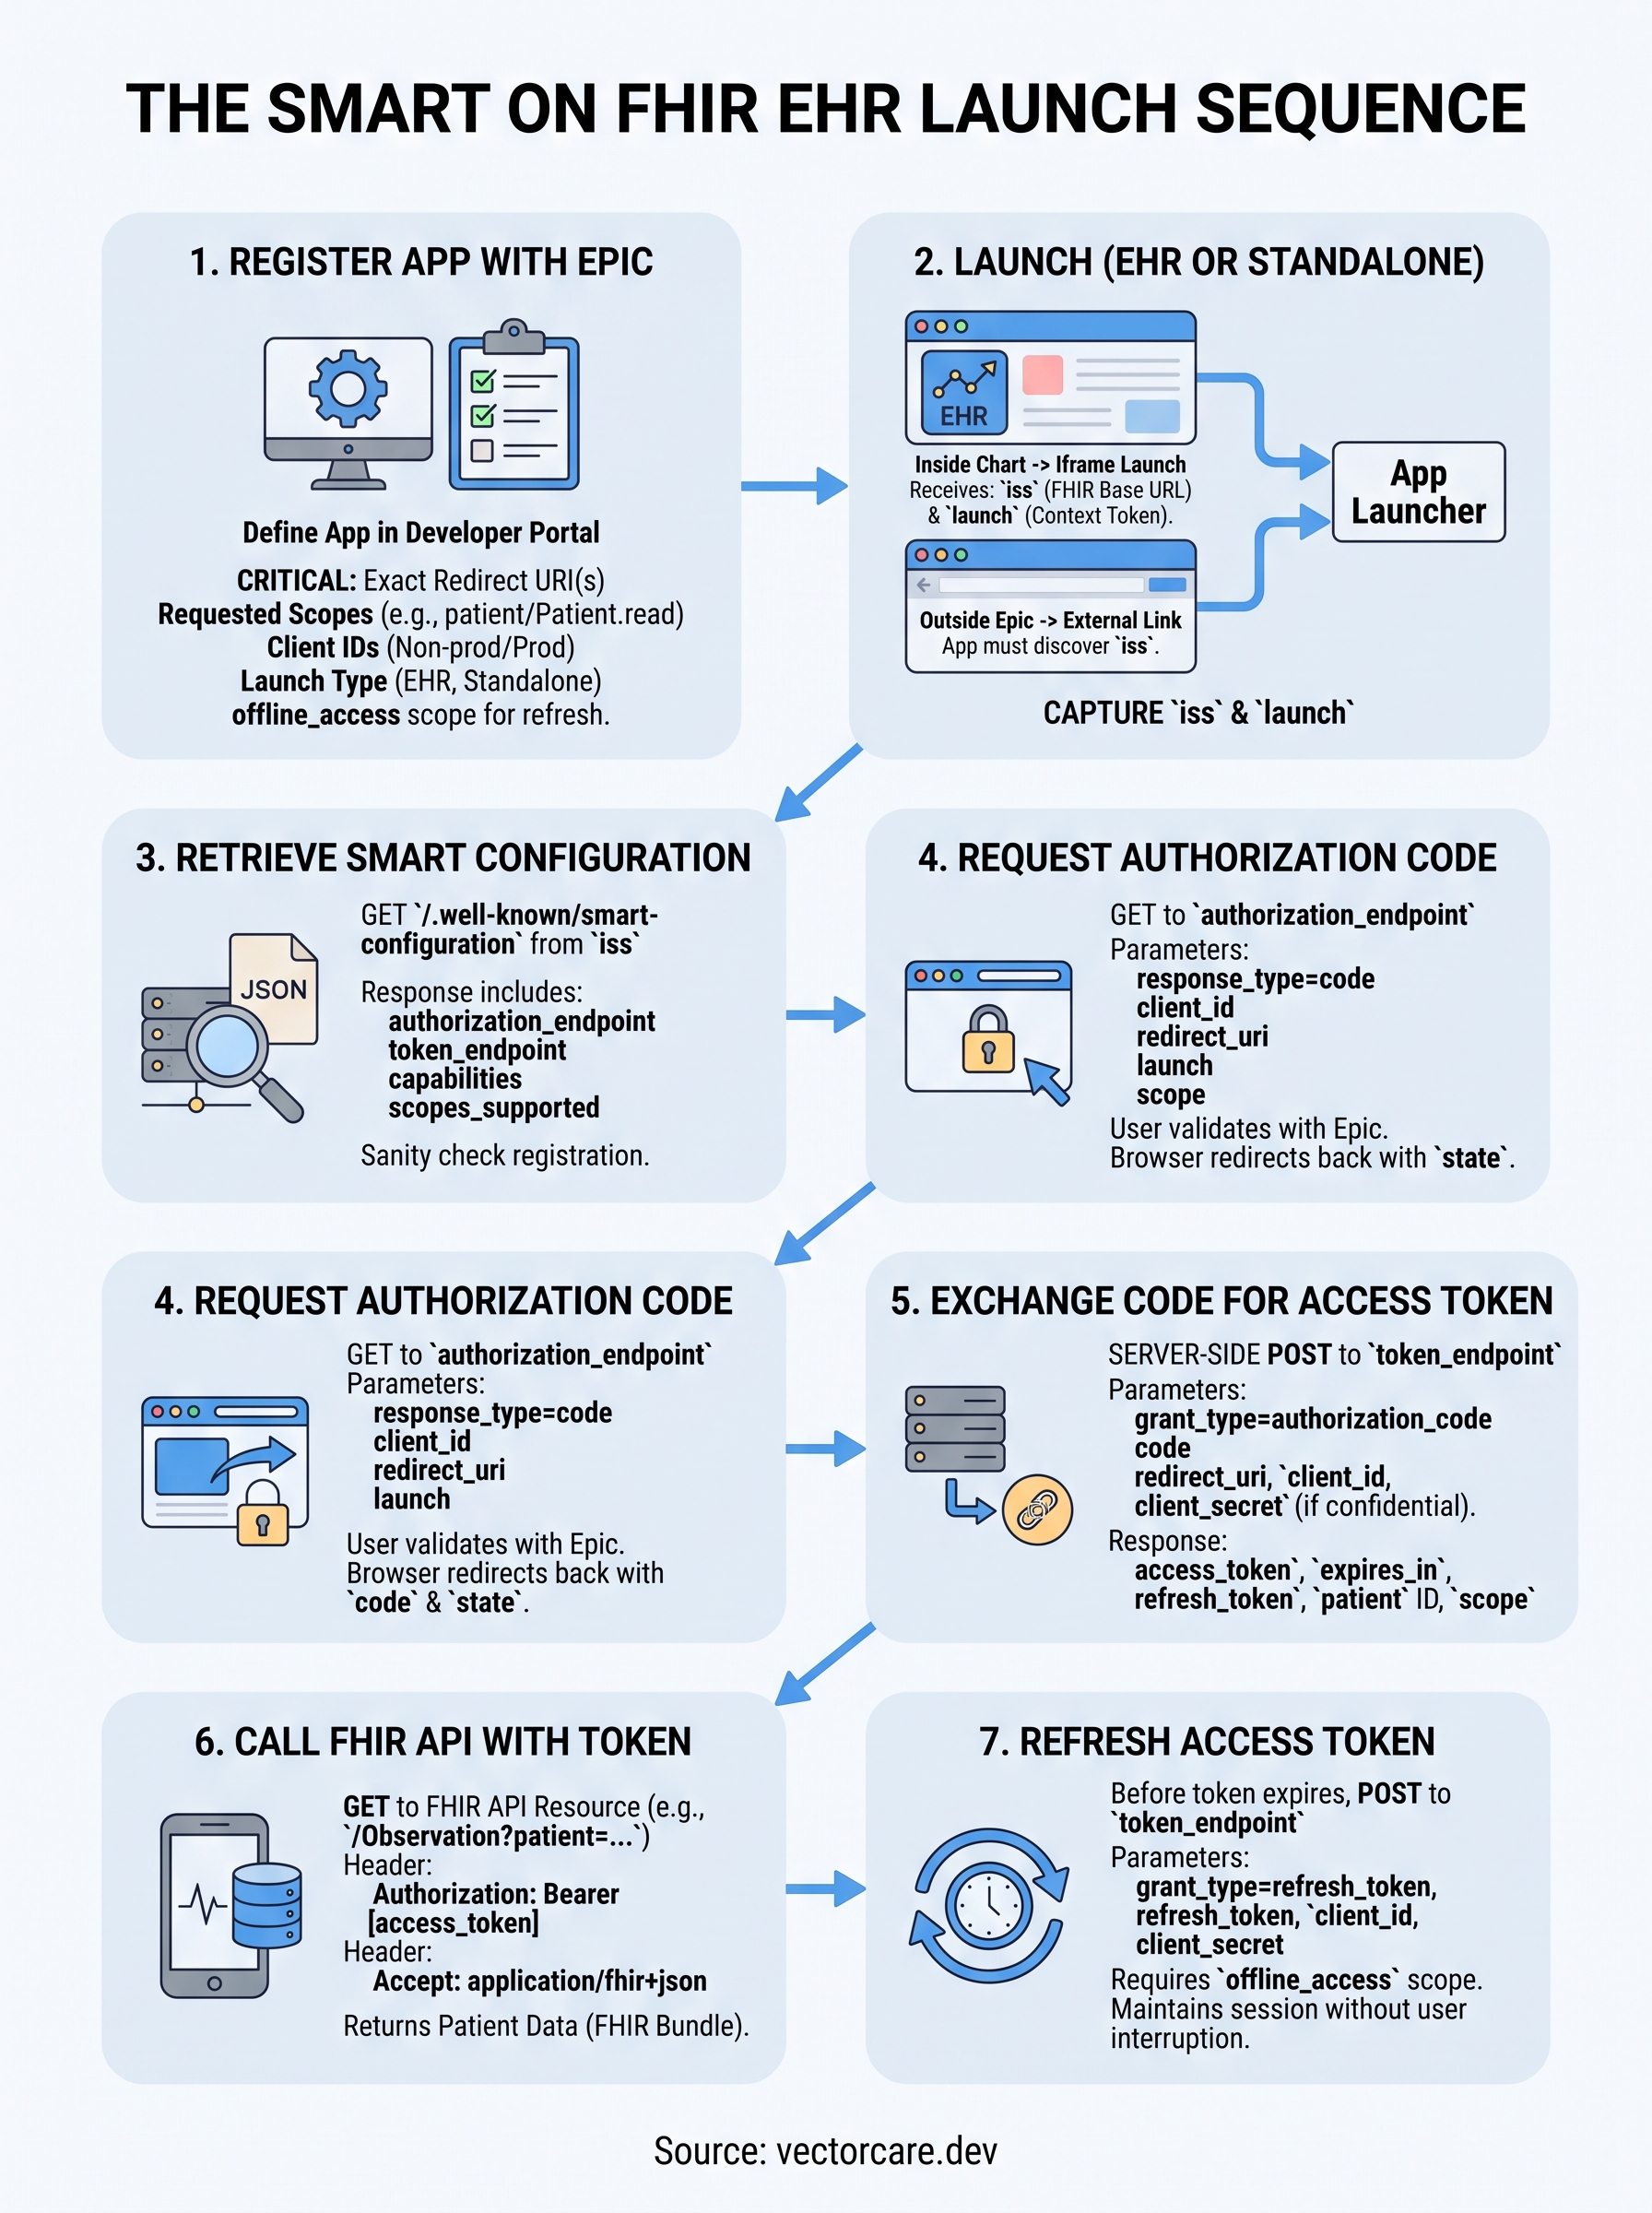
Seven steps stand between a clinician clicking your app icon and your code actually reading patient data: registration, launch, discovery, authorization, token exchange, API calls, and refresh. Skip the order or shortcut any one of them, and you get a blank iframe with no error message pointing you to the fix. That's the reality of a smart on fhir ehr launch, it rewards precision and punishes guesswork.
Getting this right the first time takes real engineering hours, and most teams underestimate how many edge cases live in token refresh and scope mismatches alone, which is a big part of why Epic integrations drag on for a year or more. If you'd rather spend that time on your actual product instead of debugging OAuth redirects, you don't have to build this yourself. VectorCare's no-code platform handles the entire launch sequence, compliance, and EPIC Showroom listing for you, cutting a 12-18 month build down to weeks. Build and deploy your SMART on FHIR app in days instead of chasing launch bugs for months.
The Future of Patient Logistics
Exploring the future of all things related to patient logistics, technology and how AI is going to re-shape the way we deliver care.
Thank you! Your submission has been received!
Oops! Something went wrong while submitting the form.