Keycloak Identity Brokering: Setup Guide For External IdPs

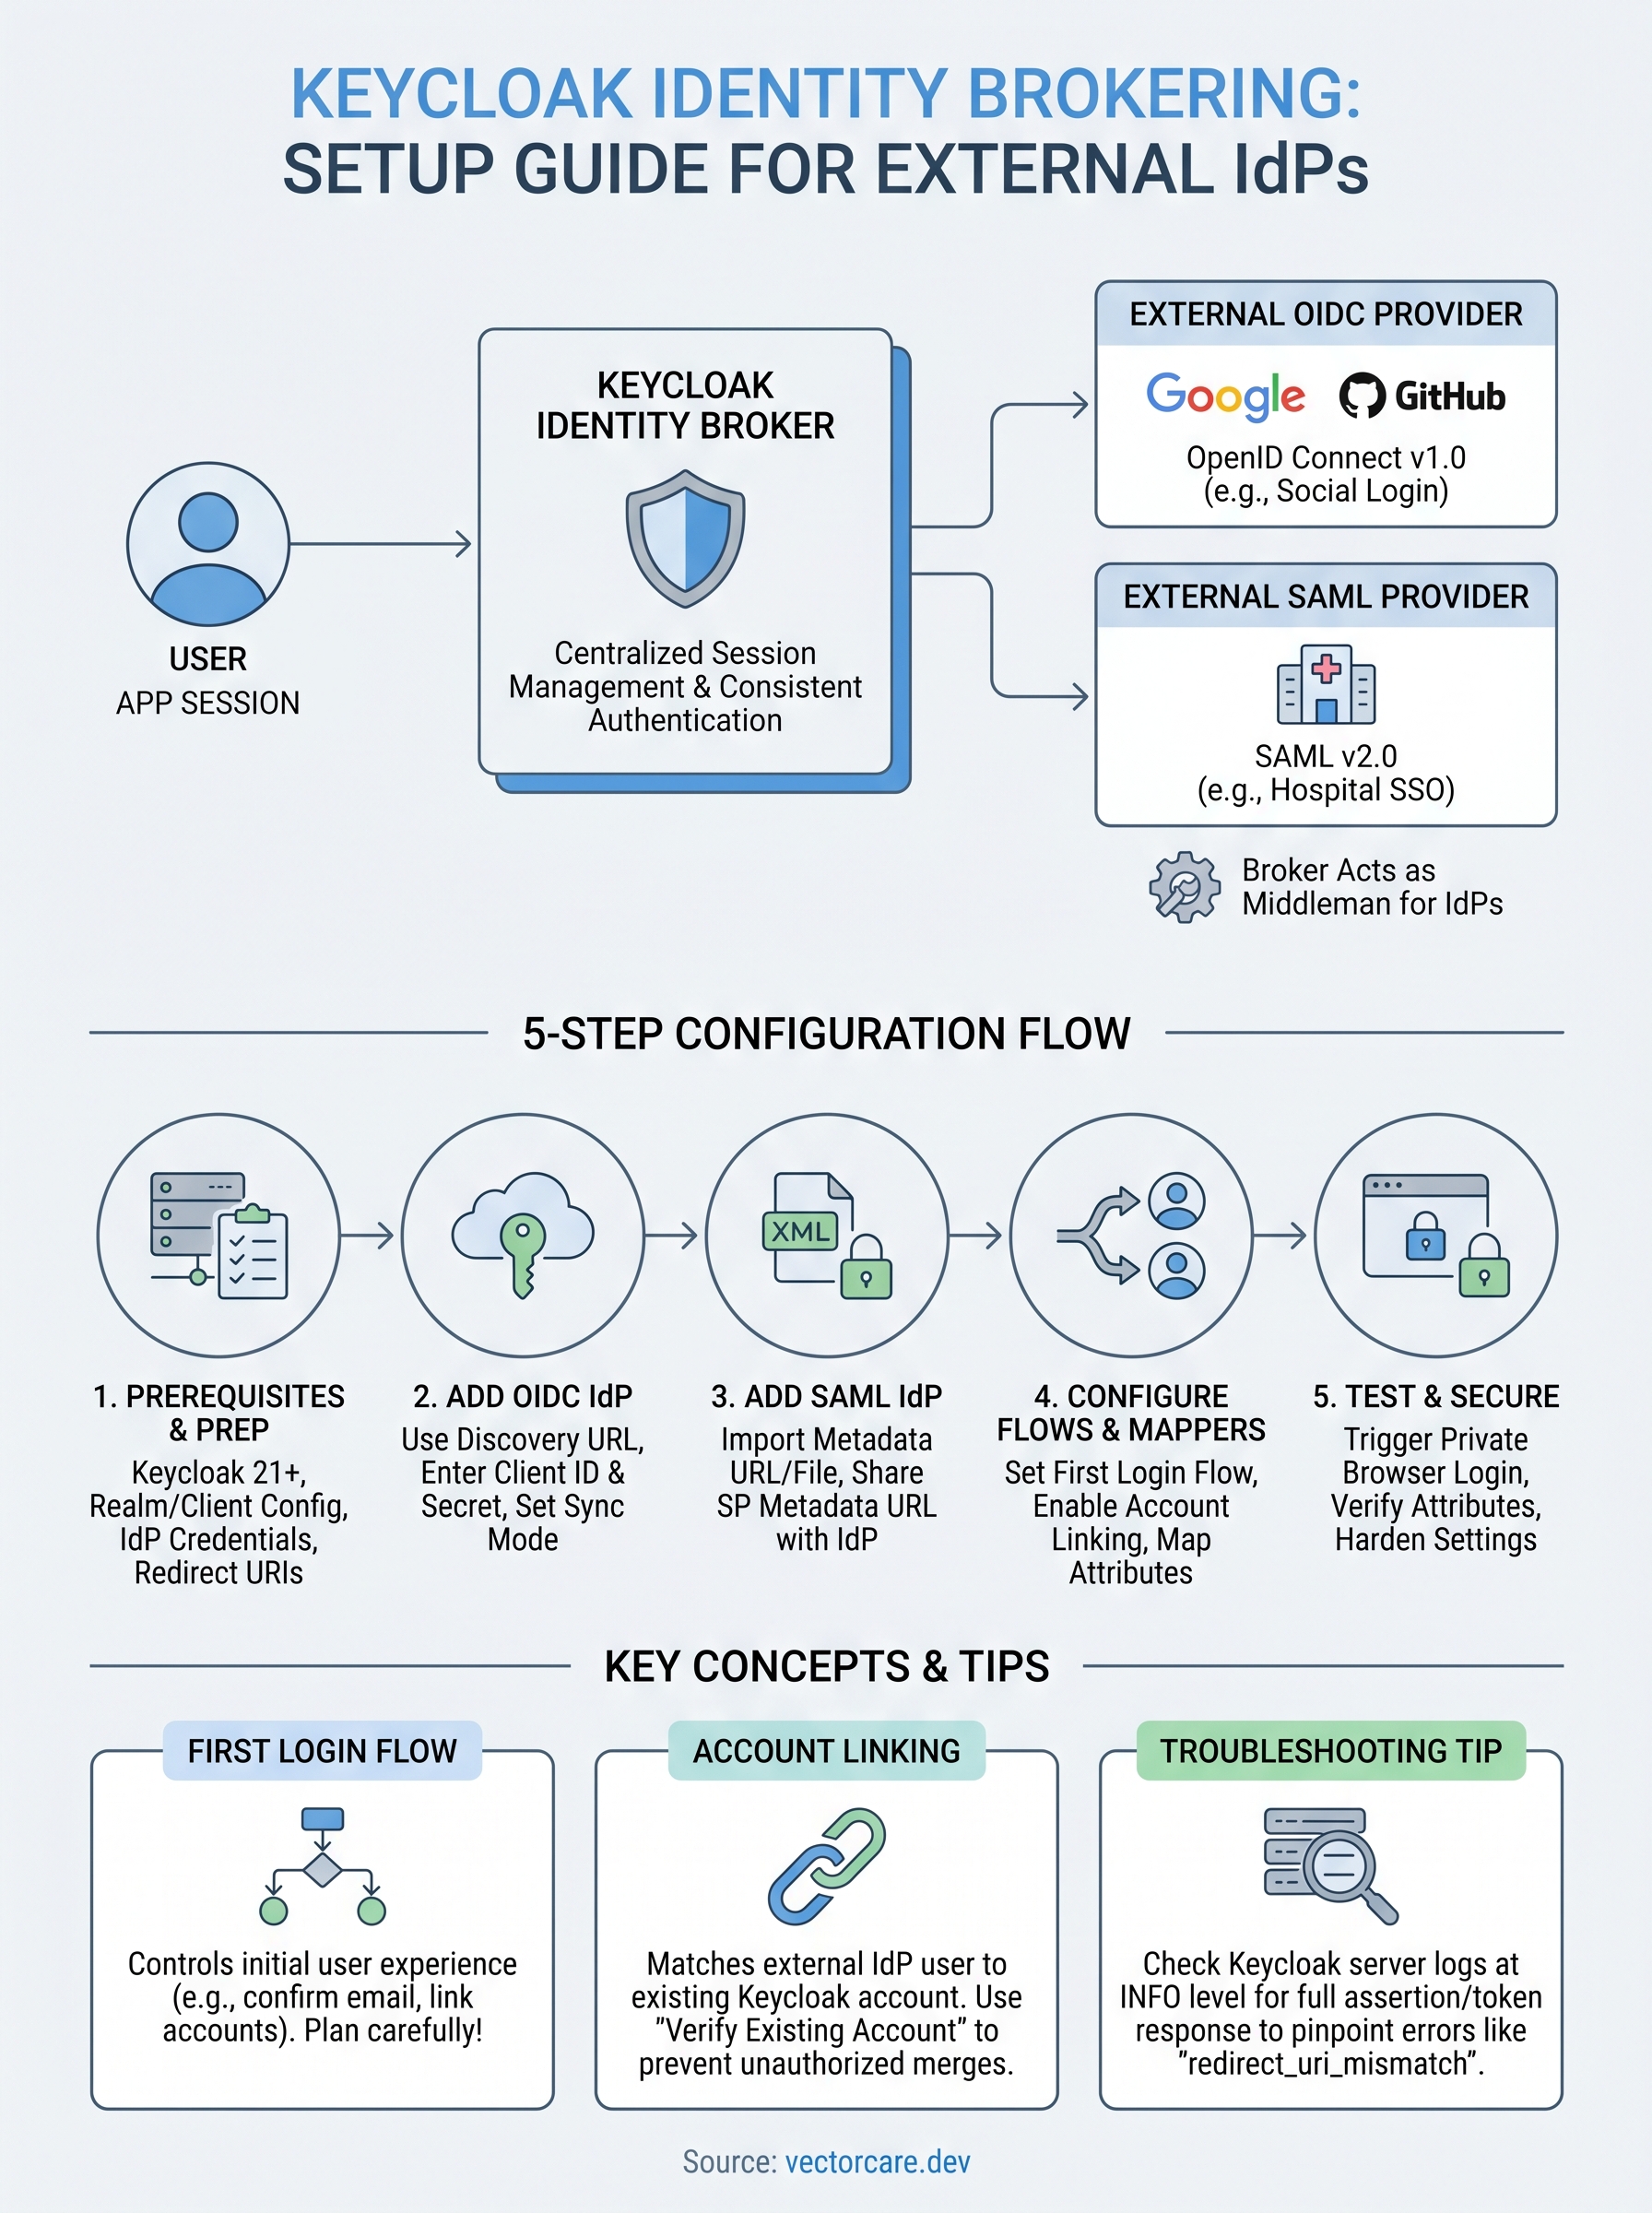
When your application needs to let users log in through external providers, Google, GitHub, a hospital's SAML-based SSO, or any OpenID Connect service, you need an identity broker sitting between your app and those providers. Keycloak identity brokering does exactly that: it acts as a middleman that handles authentication against external IdPs while keeping your application's session management centralized and consistent across every provider you connect.
At VectorCare, we build no-code SMART on FHIR applications that plug into EPIC EHR systems, and proper identity federation is a core piece of making those integrations work securely. Healthcare environments rely on strict authentication flows, often involving external identity providers managed by health systems. We've spent real time configuring Keycloak to broker these connections, and this guide reflects what we've learned doing it in production.
This article walks you through setting up Keycloak as an identity broker from scratch. You'll learn how to configure external IdPs (both OpenID Connect and SAML), map user attributes between systems, handle first-login flows, and troubleshoot the most common issues that trip people up. Whether you're connecting a single social login or federating across multiple enterprise identity providers, you'll have a working setup by the end.
Prerequisites and key concepts
Before you configure keycloak identity brokering, you need a few things in place. This section covers the software requirements and the core terminology you'll encounter throughout the guide so nothing catches you off guard mid-configuration.
What you need before you start
You need a running Keycloak instance (version 21 or later is recommended) with admin console access. Your application should already have a realm created and at least one client registered in that realm. You'll also need credentials for the external IdP you plan to connect, such as a client ID and client secret for an OIDC provider, or the metadata XML for a SAML provider.
- Keycloak 21+ installed (Docker or bare-metal)
- Admin credentials for the Keycloak console
- A configured realm and at least one client
- External IdP credentials (client ID/secret for OIDC, or metadata URL/XML for SAML)
- Network access between Keycloak and the external IdP endpoints
Core concepts to understand
Three terms appear constantly when working with identity brokering, and mixing them up leads to real configuration mistakes. An identity provider (IdP) is the external service handling the actual authentication, such as Google or your health system's SSO. A service provider (SP) is Keycloak itself in the SAML context. The first login flow is a Keycloak-specific concept that controls what happens the first time a user authenticates through a new external IdP, including whether Keycloak creates a new account or links to an existing one.
First login flow configuration is where most authentication bugs originate, so plan it before you add your first external IdP.
Step 1. Prepare your realm, client, and URLs
Before you add any external IdP, your realm and client need to be correctly configured so Keycloak knows where to redirect users after authentication. Log into the Keycloak admin console, navigate to your target realm, and confirm your client has "Standard Flow Enabled" turned on and the correct redirect URIs registered. Without this baseline setup, identity brokering will fail before it even starts.
Set your redirect URI and base URL
The redirect URI is the URL Keycloak sends users back to after a successful broker login. For keycloak identity brokering to work, each external IdP needs this exact URI registered on their side before you configure anything in Keycloak. Use this pattern:
https://<your-keycloak-domain>/realms/<realm-name>/broker/<provider-alias>/endpoint
Copy this URI exactly as shown, because a single character mismatch will cause authentication to fail silently with no clear error.
Register this URI in your external IdP's developer console under "Authorized Redirect URIs", and also set your Keycloak client's "Root URL" to your application's base domain so post-login redirects resolve correctly.
Step 2. Add an OpenID Connect identity provider
Navigate to your realm in the Keycloak admin console, select "Identity Providers" from the left menu, and click "Add provider". Choose "OpenID Connect v1.0" from the list. Keycloak assigns a unique alias automatically, but rename it to something descriptive like google or github because this alias becomes part of your redirect URI and appears throughout Keycloak's logs and audit trail.
Configure the OIDC settings
Paste the Discovery URL from your external IdP into the Discovery Endpoint field. Keycloak auto-populates the authorization, token, and JWKS endpoints from that URL. Then enter your client ID and client secret from the IdP's developer console into the matching fields.

Use the Discovery URL whenever the IdP supports it, since manual endpoint entry is the most common source of misconfiguration in keycloak identity brokering setups.
Google Discovery URL:
https://accounts.google.com/.well-known/openid-configuration
Set "Sync Mode" to FORCE if you want user attributes refreshed on every login, or LEGACY to sync only on first login. Save the provider and verify the redirect URI shown on the settings page matches exactly what you registered with the external IdP.
Step 3. Add a SAML identity provider
SAML providers are common in enterprise healthcare environments, and keycloak identity brokering handles them through the same admin console flow you used for OIDC. Navigate to "Identity Providers", click "Add provider", and select "SAML v2.0". Assign a clear alias like hospital-sso because this alias feeds directly into your SP metadata URL, which you'll need to share with the external IdP administrator.
Import the IdP metadata
The fastest way to configure a SAML provider is to paste the metadata URL from your IdP into the "Import from URL" field. Keycloak pulls the SSO URL, entity ID, and signing certificates automatically, which eliminates the manual entry errors that cause most SAML setup failures.
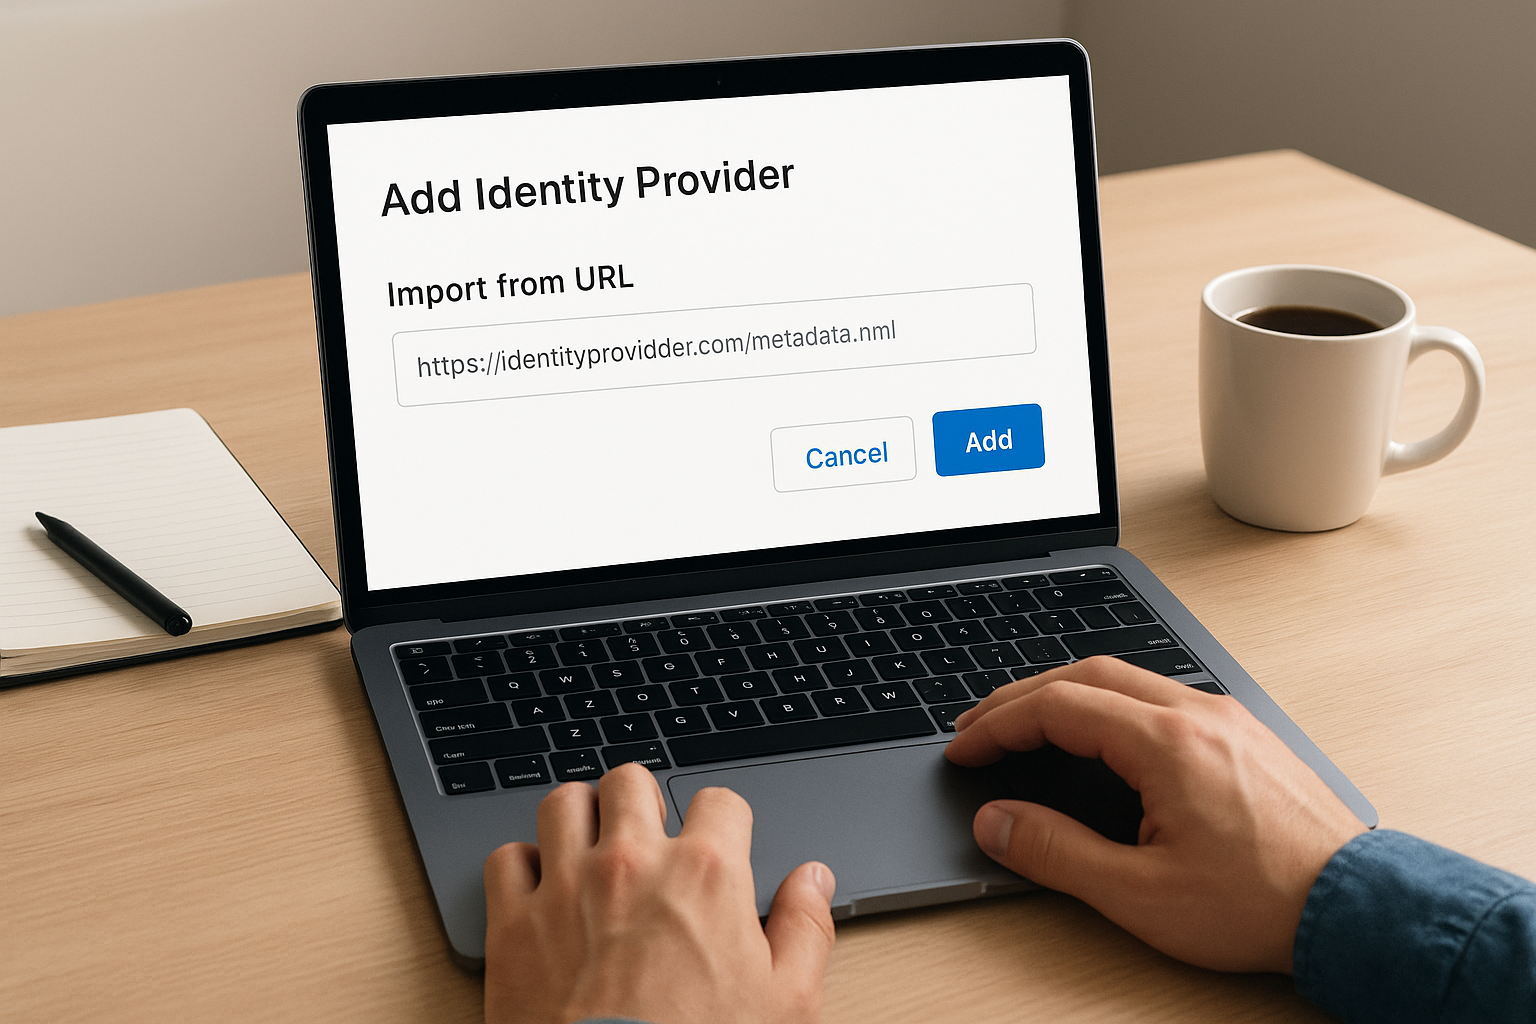
If your IdP doesn't publish a metadata URL, download the XML file and use the "Import from file" option instead.
Your Keycloak SP metadata URL follows this pattern:
https://<your-keycloak-domain>/realms/<realm-name>/broker/<alias>/endpoint/descriptor
Share this URL with your IdP admin so they can register Keycloak as a trusted service provider and configure the correct attribute assertions on their side before you test the connection.
Step 4. Configure first login, linking, and mappers
The first login flow controls what Keycloak does the first time a user authenticates through an external IdP in your keycloak identity brokering setup. Open the identity provider in the admin console, find the "First Login Flow" dropdown, and select the built-in "first broker login" flow or a custom flow you've created.
The default first broker login flow sends users an email confirmation prompt when their external email already exists in Keycloak, which blocks unauthorized account merging.
Set up account linking
Account linking tells Keycloak how to handle users whose external IdP email matches an existing Keycloak account. Configure the "Verify Existing Account By Email" authenticator in the first login flow to prompt users to confirm ownership before linking.
- Set to "Required" to force email confirmation before merging accounts
- Set to "Disabled" only in controlled environments where you fully trust the IdP
Add attribute mappers
Mappers copy specific claims from the IdP token into Keycloak user attributes on each login. Under your IdP settings, click "Mappers", then "Add mapper", and pair each claim with the correct Keycloak attribute.
Claim:  given_name  →  User Attribute: firstName
Claim:  family_name →  User Attribute: lastName
Claim:  email       →  User Attribute: email
Step 5. Test, troubleshoot, and secure the setup
With your providers configured, open a private browser window and trigger a login through each IdP. Watch for a successful redirect back to your application and confirm Keycloak creates the user account with the correct mapped attributes populated.
Fix common errors
Most failures in keycloak identity brokering fall into three categories. Check these first before digging deeper into logs:
| Error | Likely cause | Fix |
|---|---|---|
redirect_uri_mismatch |
URI not registered with IdP | Copy exact URI from Keycloak settings |
invalid_client |
Wrong client secret | Re-generate and paste the secret |
SAML signature invalid |
Certificate mismatch | Re-import IdP metadata |
Check Keycloak's server logs at
INFOlevel first; they include the full SAML assertion and OIDC token response, which pinpoints the exact failure.
Harden the configuration
Once logins work correctly, tighten your setup. Disable the "Trust Email" option on every external IdP unless you fully control that provider, because enabling it lets unverified emails bypass your email confirmation flow. Also set token expiration on each IdP connection to match your session timeout policy.
Quick recap
You now have a complete path for setting up keycloak identity brokering with both OIDC and SAML providers. You prepared your realm and redirect URIs, added external providers, configured first login flows and attribute mappers, and tested and hardened each connection.
The most important takeaway is to register your redirect URIs correctly before anything else, and to plan your first login flow behavior before real users hit it in production. Every step in this guide builds on the one before it, so skipping ahead tends to create silent failures that are hard to trace back to their root cause.
If your team works in healthcare and needs secure identity federation built directly into EPIC EHR integrations without writing the underlying infrastructure yourself, see how VectorCare handles SMART on FHIR app deployment. The same authentication rigor covered here applies at every layer of those integrations.
The Future of Patient Logistics
Exploring the future of all things related to patient logistics, technology and how AI is going to re-shape the way we deliver care.
Thank you! Your submission has been received!
Oops! Something went wrong while submitting the form.