How To Use FHIR API: REST Calls, Auth, Search, Real Examples

If you're a healthcare vendor trying to pull patient data from EPIC or another EHR system, you need to understand how to use FHIR API endpoints. FHIR (Fast Healthcare Interoperability Resources) is the standard that modern EHRs expose for reading and writing clinical data, and getting it right means the difference between a working integration and months of frustration.
Most guides on the topic either drown you in HL7 specification jargon or stay so surface-level they're useless when you actually sit down to write code. This guide takes a different approach. It walks through the real mechanics: REST calls against FHIR servers, authentication with OAuth 2.0 and SMART on FHIR, search parameters, resource handling, and concrete examples you can adapt to your own use case. Whether you're querying a sandbox for the first time or preparing for a production EPIC integration, you'll find actionable steps here.
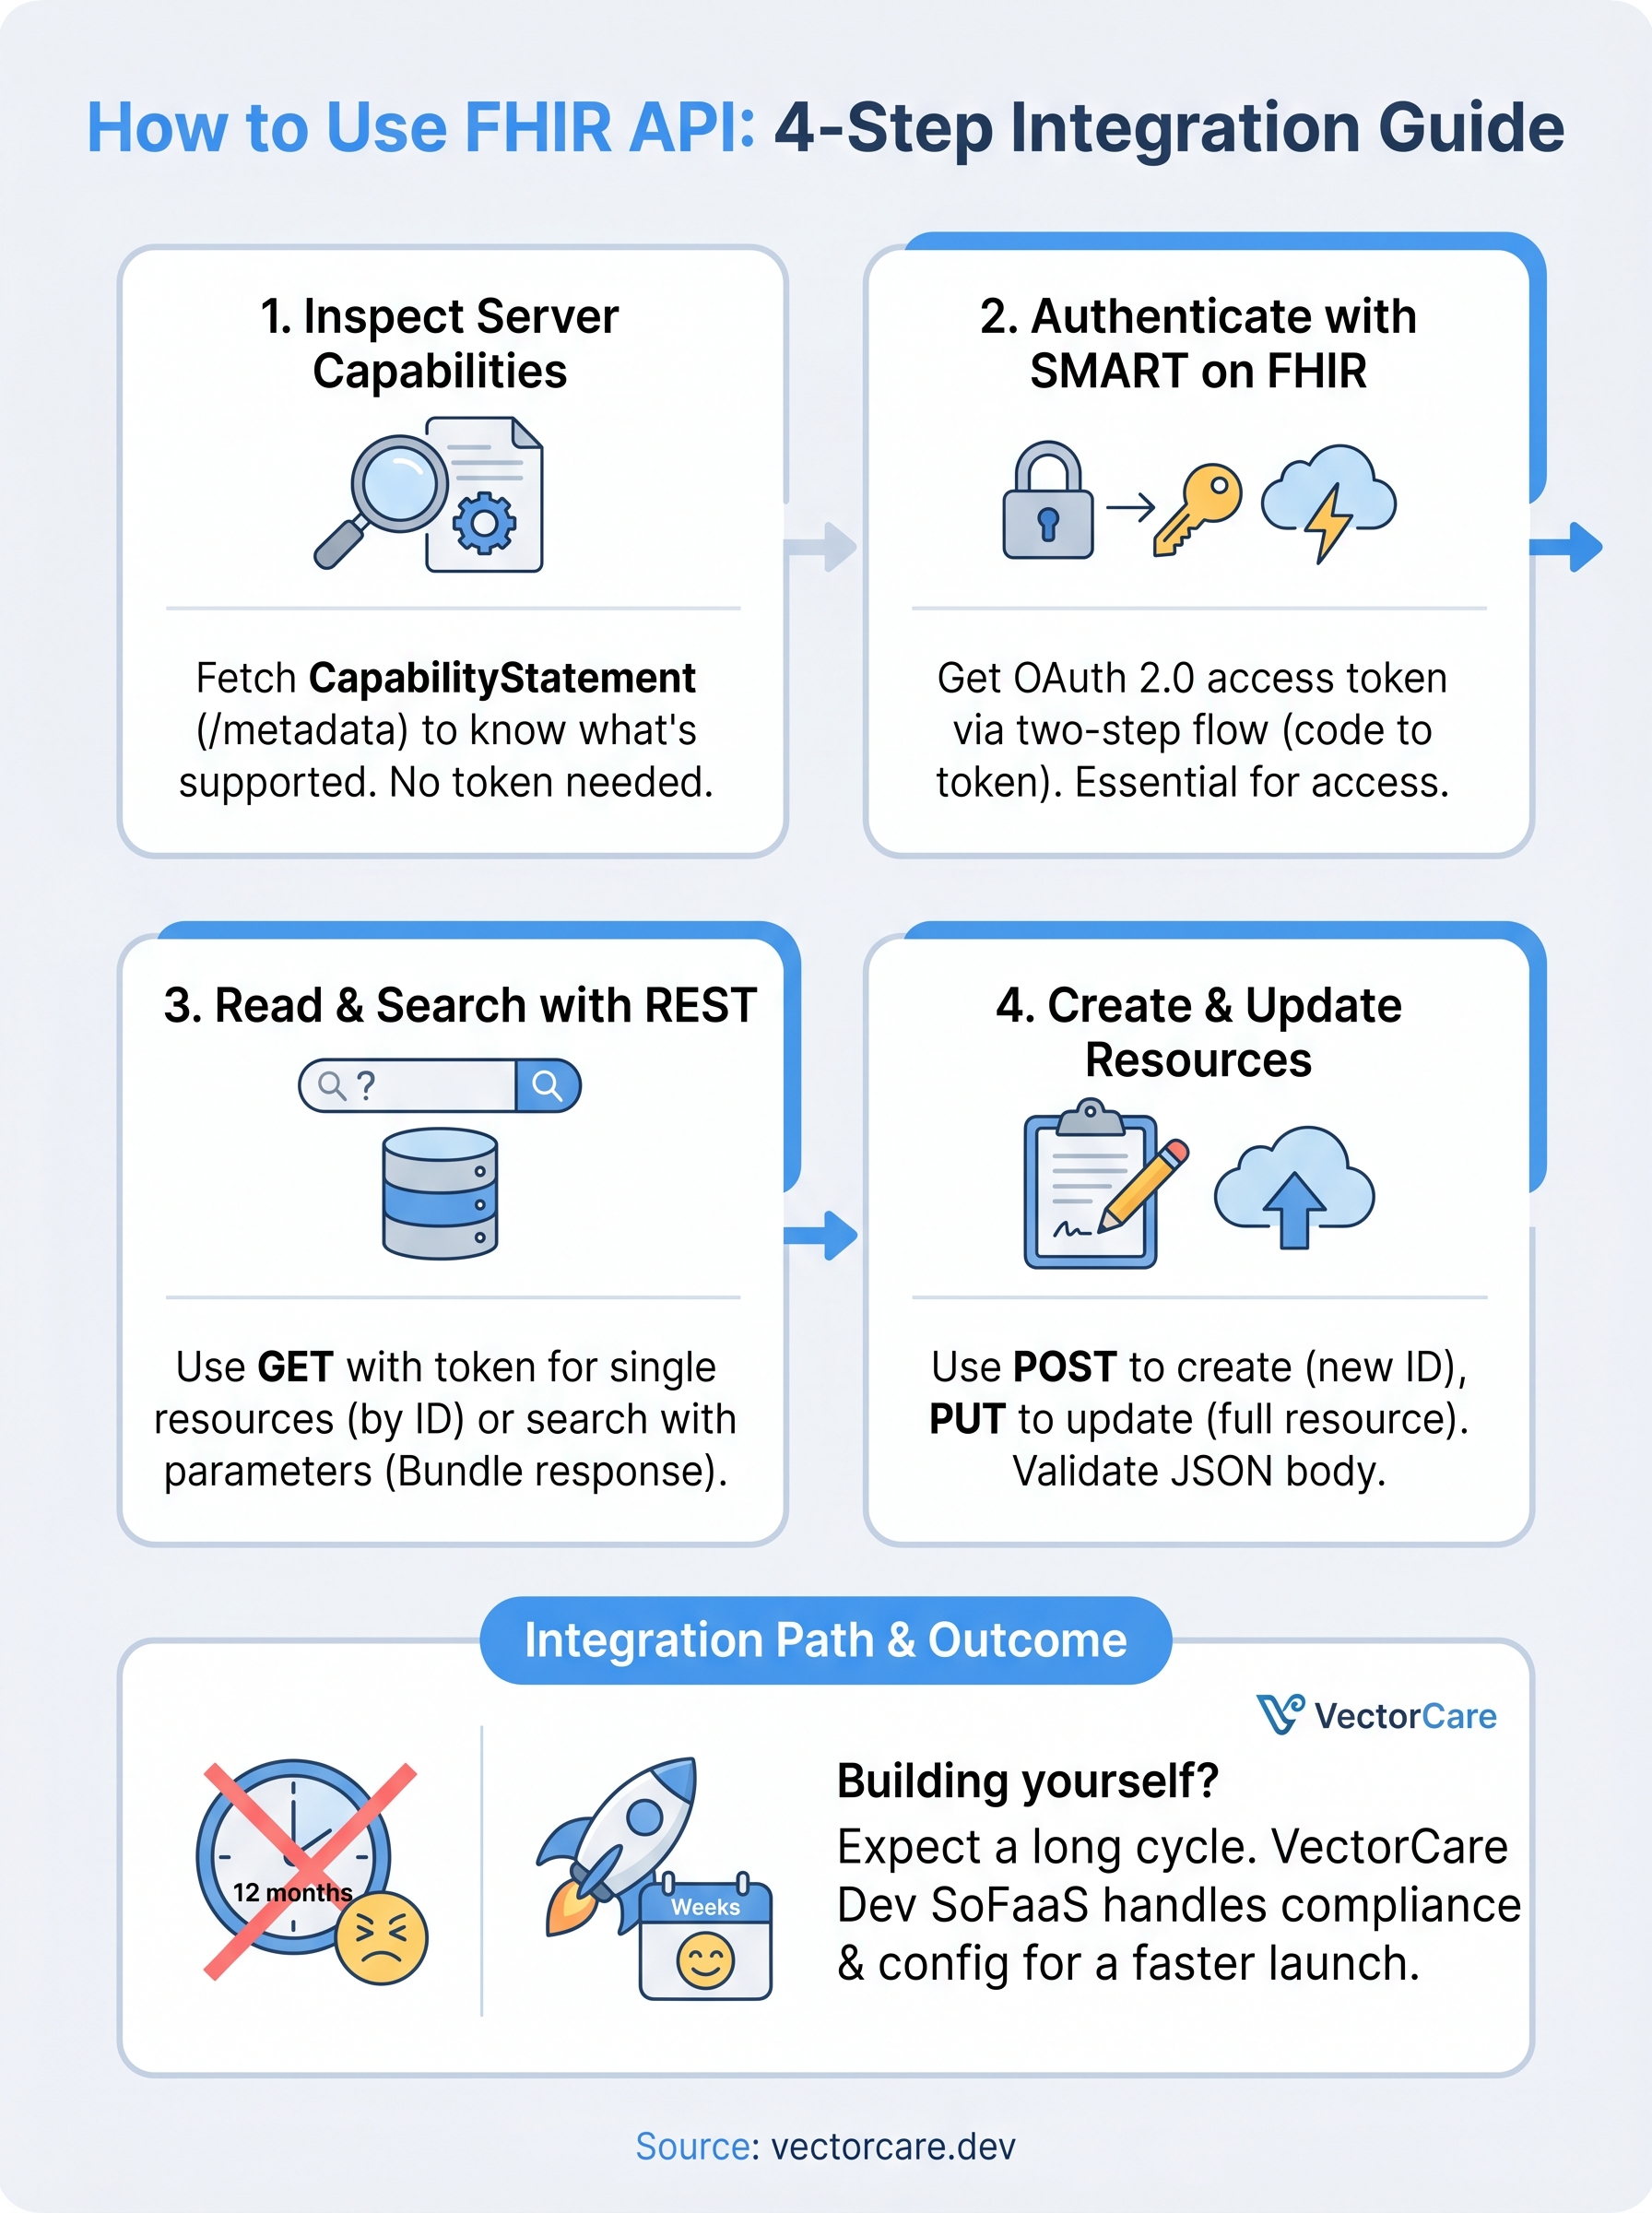
That said, building and maintaining a full FHIR integration from scratch is a serious engineering lift, especially when you factor in HIPAA compliance, SOC2 requirements, and EPIC App Orchard submission. That's exactly the problem we built VectorCare Dev SoFaaS to solve. Our no-code platform handles the FHIR configuration, compliance, and EPIC listing process so healthcare vendors can skip the 12-month dev cycle and go live in weeks. But whether you build it yourself or use a platform like ours, understanding how FHIR APIs work under the hood makes you a better decision-maker. Let's get into it.
FHIR API basics and what you need
Before you learn how to use FHIR API endpoints effectively, you need a solid mental model of what FHIR actually is. FHIR (Fast Healthcare Interoperability Resources) is a standard published by HL7 that defines how clinical data gets structured and exchanged over the web. It exposes healthcare data as RESTful resources, each with a defined URL pattern, a JSON or XML representation, and a set of supported operations. Every field, data type, and interaction pattern follows a strict specification, so once you learn how FHIR works against one compliant server, that knowledge transfers directly to others.
What FHIR resources actually are
A FHIR resource is a discrete unit of clinical information. Patient, Observation, MedicationRequest, Condition, and Encounter are among the most common types you'll work with. Each resource lives at a predictable URL on the FHIR server, and you interact with it using standard HTTP methods: GET to read, POST to create, PUT to update, and DELETE to remove. Every resource also carries a resourceType field in its JSON body along with a server-assigned logical ID that you use to address it directly in subsequent requests.
A single patient record in FHIR is not one monolithic object. It is a web of linked resources, each representing a specific clinical concept.
Here are the core resource types you will encounter most often during an EPIC integration:
| Resource | What it represents |
|---|---|
| Patient | Demographics and identifiers |
| Encounter | A clinical visit or episode of care |
| Observation | Lab results, vitals, and measurements |
| Condition | Diagnoses and problem list entries |
| MedicationRequest | Prescriptions and medication orders |
| DocumentReference | Clinical notes and attached documents |
What you need before making your first call
To start making real API calls, you need a few things in place. First, you need a FHIR server endpoint to target. For testing, EPIC provides a dedicated sandbox environment, and the SMART Health IT open sandbox also gives you a safe place to experiment without touching production patient data. Second, you need an HTTP client: curl works fine for quick one-off tests, but most teams write calls directly in Python, Node.js, or another language and use a request library to handle headers and token injection cleanly.
You also need to understand SMART on FHIR, the OAuth 2.0 profile that EPIC and most modern EHRs use to control API access. Without a valid access token, every request returns a 401 and gives you nothing. You need a registered app with the correct FHIR scopes approved before the authorization server will issue tokens. The next steps in this guide walk through each piece in sequence, starting with reading the server's capability statement so you know exactly what the server supports before you write a single request.
Step 1. Inspect the server capabilities
Before you write a single data request, you need to know what the FHIR server actually supports. Every compliant FHIR server exposes a CapabilityStatement resource at a standard endpoint that tells you exactly which resource types, search parameters, and operations are available. Skipping this step and guessing at supported fields is one of the most common ways developers waste hours debugging 404s and 400s that the capability document would have answered upfront.
How to fetch the CapabilityStatement
Fetching the capability document is a single unauthenticated GET request to the /metadata endpoint on any FHIR server. You do not need an access token for this call, which makes it the safest starting point when you first learn how to use FHIR API endpoints against a new server. Run this against the SMART Health IT open sandbox to see a real response:
curl -H "Accept: application/fhir+json" \
  https://launch.smarthealthit.org/v/r4/fhir/metadata
The server returns a JSON object with a resourceType of CapabilityStatement. The rest[0].resource array is the most useful part. Each entry in that array lists a supported resource type and the interactions and search parameters it accepts.
What to look for in the response
Scan the response for three things: the FHIR version under fhirVersion, the list of supported resource types under rest[0].resource, and the OAuth 2.0 authorization endpoint URLs nested inside the security extension at rest[0].security. That security block contains the token URL and authorization URL you will need in the next step to authenticate your requests.
Always pull the capability statement first when connecting to a new FHIR server. It is the server's contract with your integration, and it prevents wasted effort chasing endpoints that simply do not exist.
Step 2. Get an access token with SMART on FHIR
Every FHIR server that follows the SMART on FHIR spec requires an OAuth 2.0 access token before it returns any patient data. This is not optional. Without a valid token in your request header, the server rejects every call with a 401. Once you know how to use FHIR API authentication correctly, the rest of the integration becomes much more predictable.
The two-step OAuth flow
SMART on FHIR uses a standard authorization code flow. Your app redirects the user to the EHR's authorization endpoint, the user grants consent, and the server returns a short-lived authorization code to your redirect URI. You then exchange that code for an access token using a POST request to the token endpoint you pulled from the capability statement in Step 1.

Get your scopes right before you request authorization. EPIC enforces scope restrictions strictly, and requesting a scope you did not register will result in an access denied response that is difficult to debug.
The scopes you request control exactly which resources your token can read or write. For a typical read-only patient data integration, you need scopes like patient/Patient.read, patient/Observation.read, and launch/patient. Register these scopes in your app configuration before you start the flow.
Exchange the code for a token
Once you have the authorization code, make a POST request to the token endpoint to receive your bearer token:
curl -X POST https://launch.smarthealthit.org/v/r4/auth/token \
  -H "Content-Type: application/x-www-form-urlencoded" \
  -d "grant_type=authorization_code" \
  -d "code=YOUR_AUTH_CODE" \
  -d "redirect_uri=https://yourapp.com/callback" \
  -d "client_id=YOUR_CLIENT_ID"
The response includes an access_token field along with an expiry time. Store this token and attach it as a Bearer token in the Authorization header on every subsequent FHIR request.
Step 3. Read and search with REST calls
With a valid token in hand, you can now make real data requests. Reading resources and running searches are the two operations you will use most often when you learn how to use FHIR API endpoints in a production context. Both follow a consistent URL pattern: the base URL of the server, the resource type, and either a logical ID or a set of query parameters.
Reading a single resource by ID
To retrieve one specific resource, append its logical ID directly to the resource type in the URL path and send a GET request with your Bearer token in the Authorization header:
curl -H "Authorization: Bearer YOUR_ACCESS_TOKEN" \
     -H "Accept: application/fhir+json" \
     https://launch.smarthealthit.org/v/r4/fhir/Patient/87a339d0-8cae-11e8-9eb6-529269fb1459
The server returns a single Patient resource as a JSON object. The id field in the response confirms which record you fetched. Store that ID and reuse it to pull linked resources like Encounters or Observations for the same patient.
Searching with query parameters
Searching works by appending query parameters to the resource type URL. FHIR search uses a ? followed by parameter name and value pairs joined by &. The response comes back as a Bundle resource containing a total count and an array of matching entries.

Always check the
totalfield in a Bundle response. If it is higher than the number of entries returned, the server is paginating results and you need to follow thenextlink in thelinkarray to retrieve the full set.
curl -H "Authorization: Bearer YOUR_ACCESS_TOKEN" \
     -H "Accept: application/fhir+json" \
     "https://launch.smarthealthit.org/v/r4/fhir/Observation?patient=87a339d0&category=laboratory&_count=10"
This request pulls the first ten lab observations for a specific patient. Add _sort=-date to order results by newest first, which is useful when you only need the most recent values.
Step 4. Create and update resources safely
Reading data covers most use cases when you first learn how to use FHIR API endpoints, but writing back to the server is equally important for vendors whose workflows involve generating clinical data. POST creates a new resource and lets the server assign the logical ID, while PUT updates an existing resource at a specific ID you already know. Both operations require your Bearer token, a valid JSON body that conforms to the target resource type, and the Content-Type: application/fhir+json header on the request.
Validate your resource JSON against the FHIR R4 specification before sending write requests. An invalid payload returns a 422 Unprocessable Entity response, and the error message in the
OperationOutcomebody tells you exactly which field failed validation.
Creating a new resource with POST
To create a resource, send a POST request to the resource type URL without any ID in the path. The server processes the body, assigns a logical ID, and returns a 201 Created response with a Location header pointing to the newly created resource. Here is a minimal example that creates a basic Observation:
curl -X POST \
  https://launch.smarthealthit.org/v/r4/fhir/Observation \
  -H "Authorization: Bearer YOUR_ACCESS_TOKEN" \
  -H "Content-Type: application/fhir+json" \
  -d '{
    "resourceType": "Observation",
    "status": "final",
    "code": { "text": "Blood Pressure" },
    "subject": { "reference": "Patient/87a339d0" }
  }'
Updating an existing resource with PUT
To update a resource you already fetched, send a PUT request to the full resource URL that includes the logical ID. Your request body must contain the complete updated resource, not just the changed fields. FHIR does not support partial updates through PUT; send back every field the original resource contained, with your changes applied.
curl -X PUT \
  https://launch.smarthealthit.org/v/r4/fhir/Observation/abc123 \
  -H "Authorization: Bearer YOUR_ACCESS_TOKEN" \
  -H "Content-Type: application/fhir+json" \
  -d '{ "resourceType": "Observation", "id": "abc123", "status": "amended", ... }'
A 200 OK response confirms the update was accepted. Pull the resource again with a GET immediately after to verify the server stored the changes you intended.
Next steps for your FHIR integration
You now have a working understanding of how to use FHIR API endpoints across the full request lifecycle: reading the capability statement, authenticating with SMART on FHIR, querying resources, and writing data back safely. These fundamentals apply whether you are targeting EPIC, Cerner, or any other compliant EHR. Your next move is to test each step against a real sandbox, confirm your token flow works end to end, and verify that the resource types you need are actually supported by the server you are integrating with.
Building this integration yourself takes significant time, especially when you factor in HIPAA compliance, SOC2 requirements, and EPIC App Orchard submission. If your team would rather ship faster and skip the engineering overhead, deploy your SMART on FHIR app with VectorCare. The platform handles FHIR configuration, compliance, and EPIC listing so you go live in weeks, not months.
The Future of Patient Logistics
Exploring the future of all things related to patient logistics, technology and how AI is going to re-shape the way we deliver care.
Thank you! Your submission has been received!
Oops! Something went wrong while submitting the form.