How To Implement Role-Based Access Control (RBAC) in Apps

Every user who touches your application doesn't need access to everything inside it. Knowing how to implement role-based access control is what separates a secure, audit-ready app from one that's a compliance liability, especially when you're building for healthcare environments where patient data flows through every workflow.
RBAC gives you a structured way to assign permissions based on user roles rather than managing access for each individual. Done right, it limits exposure, simplifies onboarding, and satisfies the access control requirements baked into HIPAA and SOC 2 frameworks. Done wrong, it creates gaps that auditors and bad actors will find before you do. This guide walks you through the architecture, step-by-step implementation, and best practices for building RBAC into your applications, whether you're starting from scratch or retrofitting an existing system.
If you're a healthcare vendor building SMART on FHIR apps for EPIC integration, RBAC isn't optional, it's table stakes. At VectorCare Dev SoFaaS, we handle access control, compliance, and workflow logic inside our no-code platform so vendors can ship to the EPIC Showroom in weeks, not months. Below, we break down how RBAC works under the hood so you understand exactly what's protecting your users and their data.
RBAC basics and what you need before you start
Before you write a single policy rule or middleware function, you need a clear picture of the building blocks. Role-Based Access Control works by assigning permissions to roles, then assigning those roles to users rather than attaching permissions directly to individual accounts. That indirection is what makes RBAC scalable: when a job function changes, you update one role definition and every user in that role inherits the change automatically, without touching individual account settings.
The core RBAC model explained
RBAC has four primary concepts that appear in every implementation, from a small SaaS app to a large healthcare vendor platform. Understanding how these concepts interact is the foundation for learning how to implement role-based access control in a way that stays maintainable over time rather than becoming a patchwork of one-off exceptions and hard-coded permissions.
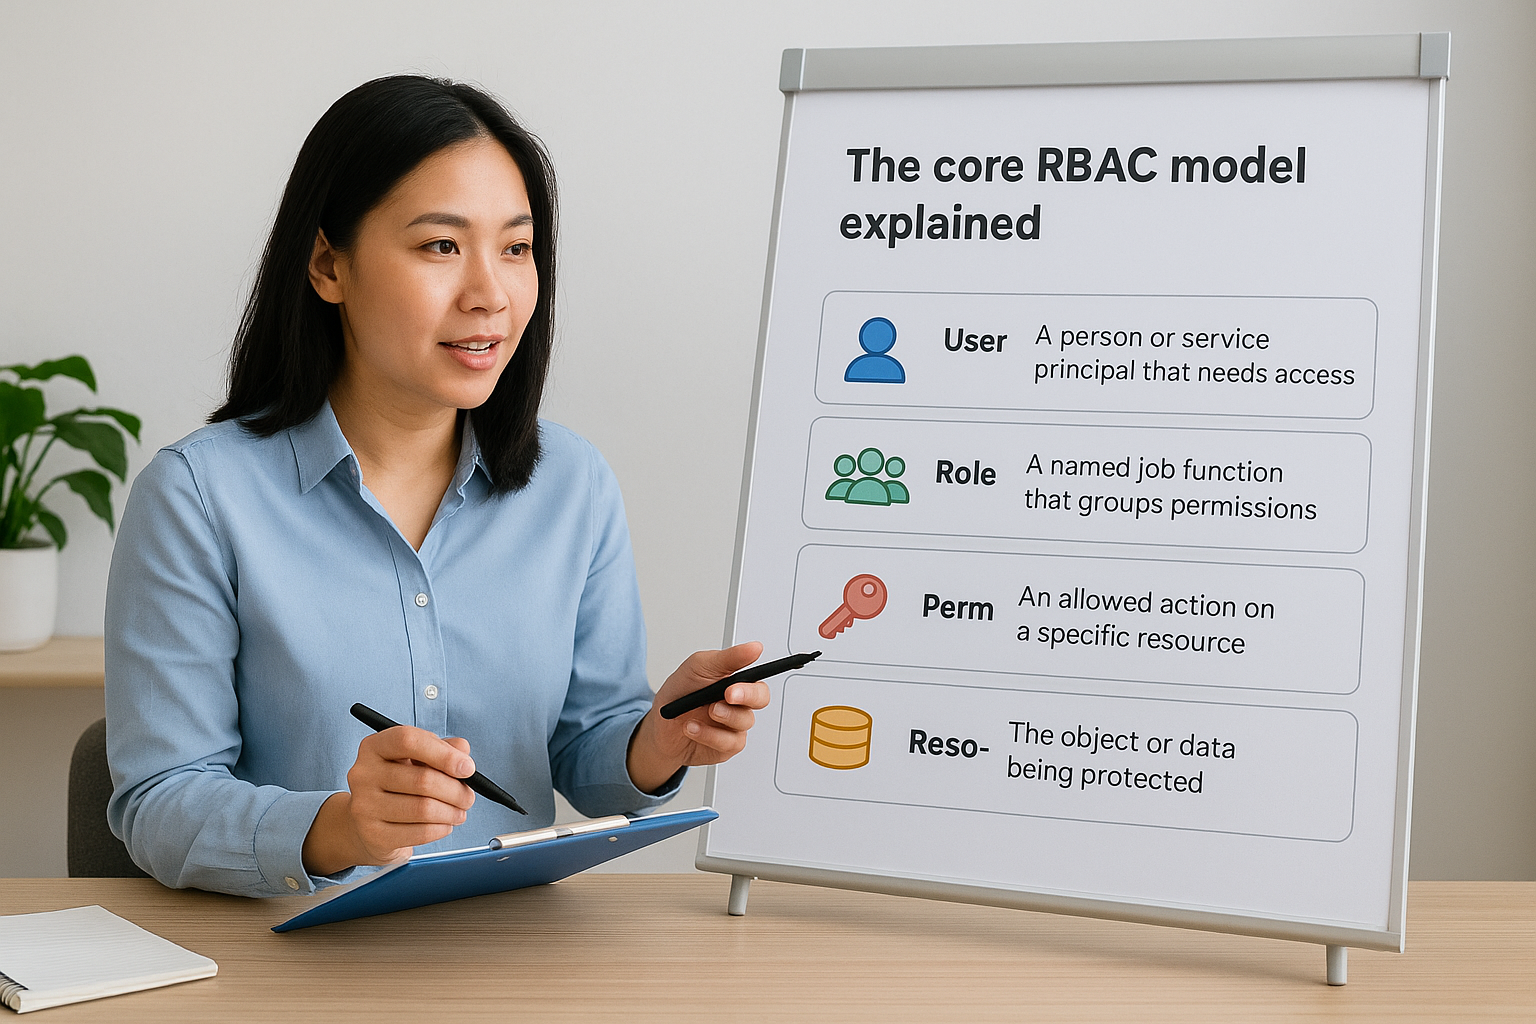
| Concept | Definition | Example |
|---|---|---|
| User | A person or service principal that needs access | A nurse logging into your app |
| Role | A named job function that groups permissions | nurse, physician, admin |
| Permission | An allowed action on a specific resource | read:patient_record |
| Resource | The object or data being protected | A patient chart, an order form |
Roles act as the intermediary layer between users and permissions. A user can hold multiple roles, and a single role can bundle dozens of permissions. The system checks the user's assigned roles at runtime and grants or denies access based on whether those roles carry the required permission for the requested resource. Most implementations store role assignments in your identity provider and resolve permissions at the API gateway or service layer, not inside individual feature functions.
If you ever grant permissions directly to individual users alongside role-based permissions, you break the model's consistency and create access paths that are impossible to audit cleanly.
Standard RBAC variants you need to know
Flat RBAC, the model described above, covers most use cases. However, two common variants extend the base model when your application needs more precision.
Hierarchical RBAC lets roles inherit permissions from parent roles. A senior_physician role might inherit everything the physician role carries, plus additional permissions for approving orders. This reduces duplication but requires you to track inheritance chains carefully so inherited permissions don't expand beyond what you intend.
Attribute-Based Access Control (ABAC) combines role checks with contextual attributes like time of day, patient consent status, or geographic location. Healthcare applications often layer ABAC conditions on top of a core RBAC model to satisfy minimum necessary access requirements under HIPAA. You don't have to choose one or the other: a hybrid approach is common and often necessary.
What to audit before you build
Jumping straight into code without an inventory of your existing users, data, and access patterns is the most common mistake teams make. Document answers to the following questions before you configure anything, so you have a concrete reference to validate your implementation against rather than guessing as you go.
First, identify every resource in your application that requires access control. In a healthcare context, this means patient records, clinical notes, order workflows, reporting dashboards, and administrative configuration settings. List them as discrete objects rather than vague categories, because vague categories produce vague permissions.
Second, catalog every type of user who will interact with the system. For a vendor building on EPIC, that includes clinical staff at the health system as well as your own internal support and engineering teams. Different user populations often need separate role structures, and merging them creates permission bloat that grows harder to manage with every new customer.
Third, document your compliance requirements explicitly before you design any role. HIPAA's minimum necessary standard requires that users access only the data they need for their specific job function. SOC 2 Type II auditors will ask for evidence that access controls are enforced, logged, and reviewed on a defined schedule.
Finally, pin down your identity provider and token format before implementation starts. If you're building SMART on FHIR apps for EPIC integration, your identity layer uses OAuth 2.0 and JSON Web Tokens (JWTs). Microsoft's identity platform documentation covers token handling patterns in depth. Aligning your RBAC model with your token structure from day one prevents significant rework later, particularly around how roles and claims get embedded in and validated from access tokens.
Step 1. Map roles to real workflows and data
The most common failure in RBAC design is building roles around system concepts rather than real user behavior. If your roles don't map to actual job functions and the data those functions require, you'll spend months patching permission gaps every time a new workflow surfaces. Before you touch any configuration or code, sit down with the people who actually use the system and document what they do in concrete terms.
Start with real job functions, not abstract labels
Generic role names like "viewer" or "editor" feel convenient, but they obscure the actual access patterns you need to enforce. Instead, name roles after the job functions in your application's target workflows. If you're building a SMART on FHIR app for EPIC integration, your roles might look like care_coordinator, referring_physician, billing_staff, and vendor_admin. Each name tells you exactly who holds the role and what context their permissions belong to.
Conduct short discovery sessions with actual users or product owners for each role type. Ask two questions: what data do they need to read, and what actions do they need to take on that data. Record the answers in a role matrix before you design a single permission. Here's a minimal starting template:
| Role | Resources Accessed | Actions Allowed | Data Restrictions |
|---|---|---|---|
care_coordinator |
Patient referrals, task queue | Create, read, update | Assigned patients only |
referring_physician |
Patient orders, clinical notes | Read, submit | Own patients only |
billing_staff |
Invoices, authorization records | Read, export | No clinical notes |
vendor_admin |
App configuration, user accounts | Full CRUD | No patient records |
Tie each role to specific data boundaries
Knowing what actions a role performs is only half the picture. Data boundaries define which records a role can act on, and they're what separate a well-built RBAC system from one that leaks information across organizational lines. A care_coordinator who can read all patient referrals in the system creates a HIPAA exposure, even if they can't modify records they don't own.
When you understand how to implement role-based access control correctly, you define both the action and the scope in the same step. For each role in your matrix, add an explicit data filter: assigned patients, their own organization, records created within a date range, or cases matching a specific status. This constraint becomes a parameter you pass to your data layer, not an afterthought bolted on after launch.
Define data boundaries at the role design stage, not during code review, because retrofitting scope filters into an existing query layer costs significantly more than building them in from the start.
Step 2. Design permissions, scopes, and constraints
With your roles mapped to real workflows, you're ready to define the permissions each role carries. Permissions are not free-form strings you invent as you go; they need a consistent structure that your backend can parse reliably and that your team can audit without guessing what each entry means. The naming convention you choose here determines how readable your policy files and access logs will be six months from now, which is central to understanding how to implement role-based access control in a way that holds up under real scrutiny.
Define permissions using a consistent naming convention
A clean permission string combines an action verb and a resource noun separated by a colon: action:resource. This pattern reads clearly in code and in audit reports. Avoid open-ended labels like manage or access because they obscure the actual operation and make it impossible to apply the principle of least privilege accurately.
Here are concrete examples for a healthcare vendor app:
read:patient_record- fetch a patient record from the FHIR endpointcreate:referral- submit a new referral orderupdate:task_status- change the status of a care coordination taskdelete:draft_order- remove an unsigned draft orderexport:billing_report- generate and download a billing report
Map each permission to exactly one operation on one resource type. Bundling multiple operations into a single permission (for example, manage:orders) forces you to grant more access than necessary whenever any one operation is needed, which directly violates the minimum necessary standard in HIPAA environments.
Every permission you add is a surface area you need to audit. Keep the list as short as your workflows allow, and expand it only when a new workflow explicitly requires it.
Add scopes and contextual constraints
Once you have a clean permission list, layer scope constraints on top of each permission to restrict which records it applies to. A scope transforms a flat permission like read:patient_record into a bounded one: read:patient_record where assigned_to = current_user. This constraint lives in your data layer or policy engine, not in the permission string itself, but it belongs in your permission design documentation before you write a single line of implementation code.

Common scope types for healthcare applications include ownership filters (records assigned to the requesting user), organizational boundaries (records belonging to the user's health system), and status filters (only records in a specific workflow state). Document each scope alongside its parent permission in a policy specification file now. That file becomes your source of truth when auditors ask for evidence that your access controls match your stated data boundaries.
Step 3. Implement RBAC in your backend APIs
Your backend is where access control decisions actually happen. The UI can hide buttons and links, but if your API doesn't enforce permissions independently, anyone with a valid token and a REST client can bypass your frontend entirely. This is the layer where you know how to implement role based access control in a way that holds under real attack conditions, not just under normal usage.
Validate roles and permissions in middleware
The cleanest place to enforce permissions is in a dedicated middleware layer that runs before your route handlers execute. This approach keeps access control logic out of individual controller functions and gives you a single place to update policies without hunting through feature code. Every protected route passes through the same check, so no endpoint goes unguarded by accident.

Here's a minimal Node.js middleware example using JWT claims:
function requirePermission(permission) {
  return (req, res, next) => {
    const userPermissions = req.user?.permissions || [];
    if (!userPermissions.includes(permission)) {
      return res.status(403).json({ error: "Forbidden" });
    }
    next();
  };
}

// Apply to a specific route
app.get(
  "/api/patient-records/:id",
  authenticate,
  requirePermission("read:patient_record"),
  getPatientRecord
);
Your JWT payload should carry the user's roles or resolved permissions as claims when the identity provider issues the token. Never trust a permission claim the client sends separately from the token; always derive permissions server-side from the token's role claims or a policy store lookup. Microsoft's identity platform documentation covers how to embed and validate custom claims in access tokens.
Never perform permission checks inside individual controller functions. Centralizing that logic in middleware ensures no route goes unprotected by accident.
Enforce data-level scope filters in your query layer
Middleware gates the request, but scope filters protect the data inside the response. After your middleware confirms the user holds the read:patient_record permission, your query layer still needs to restrict the result set to records the user is actually authorized to see. Skipping this step grants access to the right action on the wrong data, which is a direct HIPAA exposure for healthcare vendor applications.
Pass the authenticated user's scope context directly into your data service, then apply it as a filter condition before executing the query:
async function getPatientRecord(req, res) {
  const { id } = req.params;
  const { userId, orgId } = req.user;

  const record = await db.patients.findOne({
    where: {
      id,
      assigned_coordinator: userId,  // scope: own patients only
      org_id: orgId,                 // scope: own organization only
    },
  });

  if (!record) return res.status(404).json({ error: "Not found" });
  res.json(record);
}
Applying these filters at the query level rather than filtering results after retrieval is both more secure and more efficient, because records that fail the scope check never leave your database in the first place. Document each filter condition alongside its corresponding role in your policy specification file so auditors can trace every data boundary back to a deliberate design decision.
Step 4. Enforce RBAC in the UI and client apps
Your backend enforces access, but your UI shapes the user experience around those decisions. When you understand how to implement role based access control correctly, you treat client-side enforcement as a usability layer, not a security layer. Hiding buttons and routes from users who lack the required permissions reduces confusion, prevents accidental action attempts, and keeps the interface clean for each role group. Think of it as removing friction, not building a wall.
Conditionally render UI elements from role claims
Read the user's role claims directly from the decoded JWT after authentication and use them to control which components render. Pass the role context through a shared state or context object so every component can check permissions without making additional API calls. Here's a minimal React example:
function PatientActions({ userPermissions }) {
  return (
    <div>
      {userPermissions.includes("create:referral") && (
        <button>Create Referral</button>
      )}
      {userPermissions.includes("export:billing_report") && (
        <button>Export Report</button>
      )}
    </div>
  );
}
Pull permissions from your decoded token payload rather than a separate client-managed state object. Client-managed state can be manipulated through the browser console, but a validated JWT cannot be altered without breaking its signature. Keep your permission check logic in a shared utility function and apply it consistently across every component that needs it, rather than duplicating conditional logic throughout your codebase.
Never render sensitive UI elements and rely solely on CSS to hide them from unauthorized users. A hidden element still exists in the DOM and is accessible to anyone who inspects the page source.
Protect client-side routes from unauthorized navigation
UI component gating alone is not enough if your application uses client-side routing. A user who types /admin/settings directly into the address bar bypasses any button-level check entirely. Wrap protected routes in a permission guard that checks role claims before rendering the page component, and redirect unauthorized users to a safe fallback route immediately.
Here's a route guard pattern for React Router:
function ProtectedRoute({ permission, children }) {
  const { permissions } = useAuth();
  if (!permissions.includes(permission)) {
    return <Navigate to="/unauthorized" replace />;
  }
  return children;
}

// Usage
<ProtectedRoute permission="read:patient_record">
  <PatientDetailPage />
</ProtectedRoute>
Apply this guard to every route that touches protected resources, including nested routes inside admin or configuration sections. Your backend will catch unauthorized API calls regardless, but guarding routes at the client level prevents unnecessary requests and gives users a clear, immediate signal when they try to reach something outside their role's defined scope. Consistent route guarding also makes your access control story easier to explain during a compliance review.
Step 5. Test, audit, and operate RBAC long-term
Understanding how to implement role based access control doesn't stop at deployment. RBAC systems drift over time as workflows change, new roles get added, and engineers make one-off exceptions under deadline pressure. Automated tests and scheduled audits are what keep your access model honest months after launch, when the original designers may no longer be actively involved in the codebase.
Write permission tests for every role
Every role in your system needs a dedicated test suite that verifies both what it can do and what it cannot. A test that only checks the happy path misses the more dangerous scenario: a role accessing a resource it should be blocked from. Write one positive test and at least one negative test for each permission-role combination in your matrix.
Here's a minimal Jest test pattern you can adapt:
describe("care_coordinator role", () => {
  it("can read assigned patient records", async () => {
    const res = await request(app)
      .get("/api/patient-records/123")
      .set("Authorization", `Bearer ${careCoordinatorToken}`);
    expect(res.status).toBe(200);
  });

  it("cannot export billing reports", async () => {
    const res = await request(app)
      .get("/api/billing/export")
      .set("Authorization", `Bearer ${careCoordinatorToken}`);
    expect(res.status).toBe(403);
  });
});
Run these tests in your CI pipeline on every pull request so a permission regression never ships to production undetected. Add a new test block whenever you introduce a new role or permission, treating your test suite as the living record of your access control spec.
Your permission tests are also your audit evidence: when a compliance reviewer asks how you verify access controls, point them directly to your test suite and its CI run history.
Run access audits on a scheduled cadence
Static tests catch regressions, but periodic access audits catch drift that happens outside your codebase, like stale role assignments, over-permissioned service accounts, and users who changed job functions but kept their old roles. Schedule a formal review every 90 days at minimum, and align it with your SOC 2 evidence collection cycle.
During each audit, pull a full report of every user, their assigned roles, and last-login date from your identity provider. Flag any account that hasn't authenticated in 60 days for deprovisioning, and flag any role assignment that doesn't match the user's current job function for immediate correction.
Handle role changes and deprovisioning promptly
When a user changes roles, remove the old role before assigning the new one rather than stacking roles on top of each other. Stacked roles accumulate permissions silently and produce access profiles that match no single job function in your original design, which makes audit reports unreadable and minimum-necessary compliance impossible to demonstrate.
Automate deprovisioning by connecting your identity provider to your HR system's offboarding workflow wherever possible. Microsoft's identity platform documentation covers lifecycle management patterns that work directly with Entra ID. A user who leaves the organization or changes teams should lose their previous role access on their last day in that function, not on the day someone remembers to update it manually.
Next steps
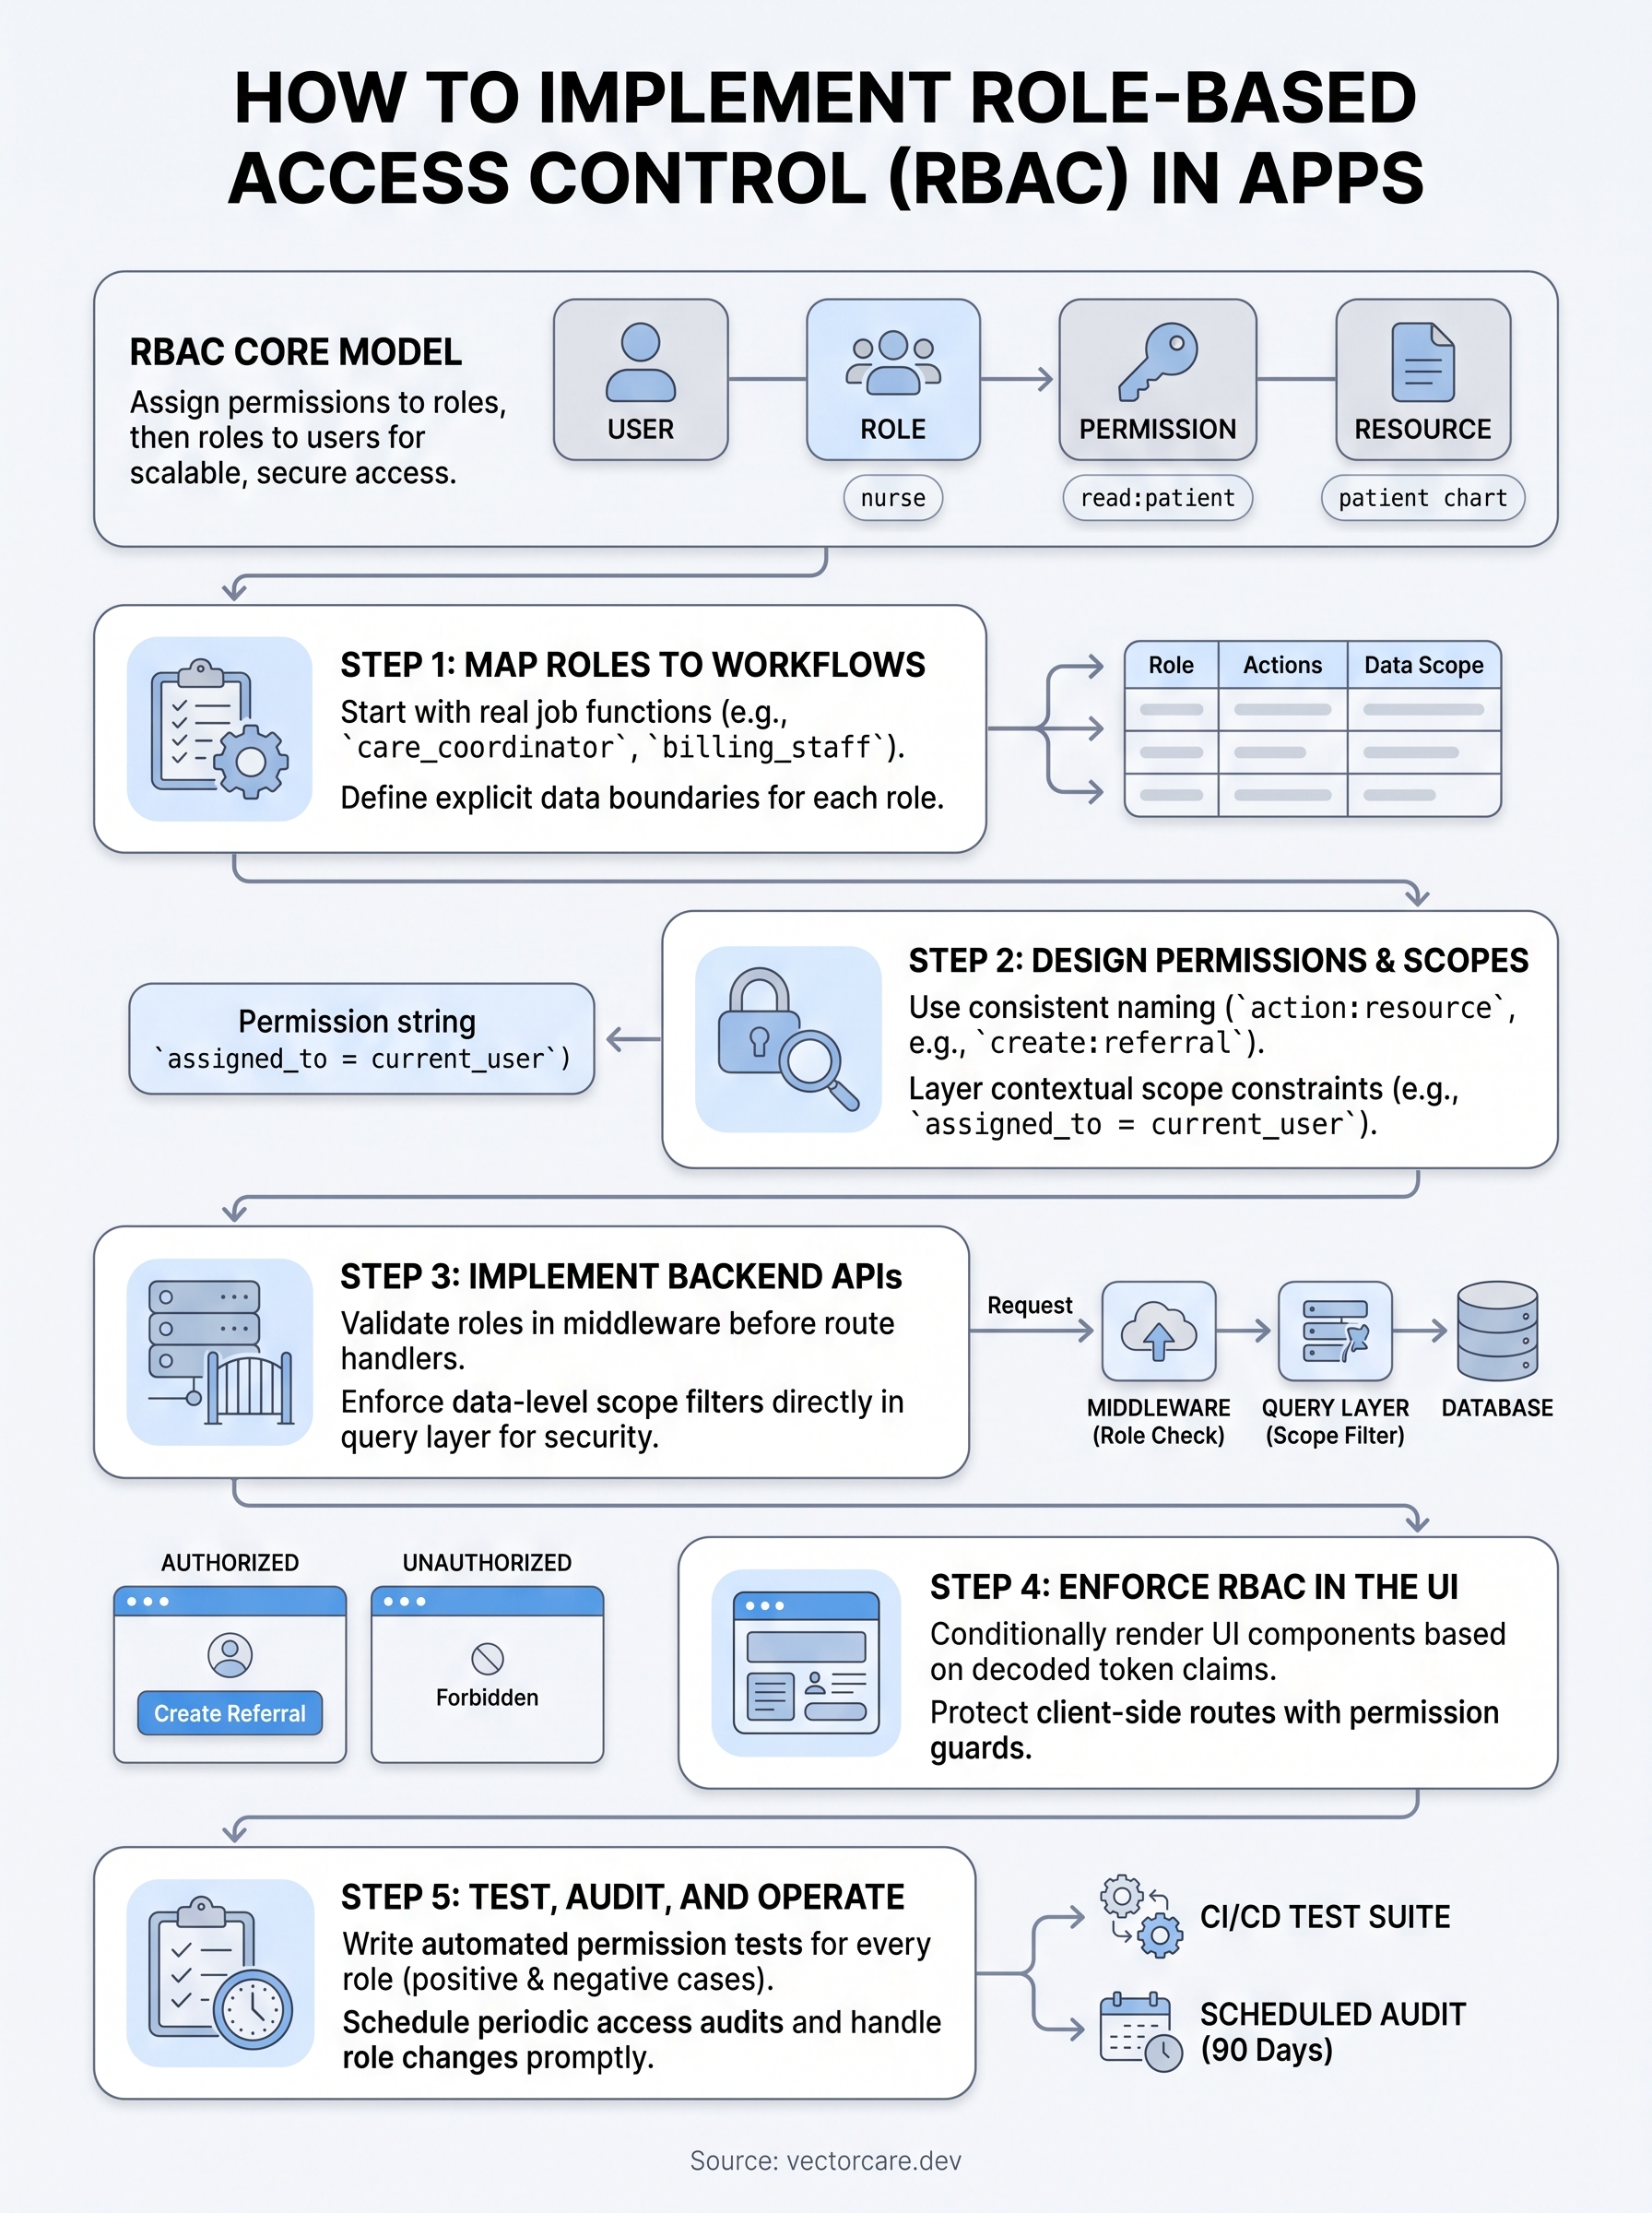
You now have a complete picture of how to implement role-based access control from initial role mapping through long-term audit operations. The process follows a clear sequence: define roles against real workflows, design permissions with consistent naming, enforce decisions at both the API and UI layers, and test every role combination before and after deployment. Each step builds on the previous one, so skipping straight to code without the role mapping work will cost you more time fixing gaps than starting methodically would have taken.
If you're building a SMART on FHIR application for EPIC integration, you also need to layer RBAC decisions on top of OAuth 2.0 token validation, HIPAA minimum-necessary requirements, and SOC 2 evidence collection, all while keeping your development timeline realistic. That combination is exactly what VectorCare Dev SoFaaS handles inside its no-code platform, so your team can ship a compliant, access-controlled EPIC app in weeks rather than months.
The Future of Patient Logistics
Exploring the future of all things related to patient logistics, technology and how AI is going to re-shape the way we deliver care.
Thank you! Your submission has been received!
Oops! Something went wrong while submitting the form.